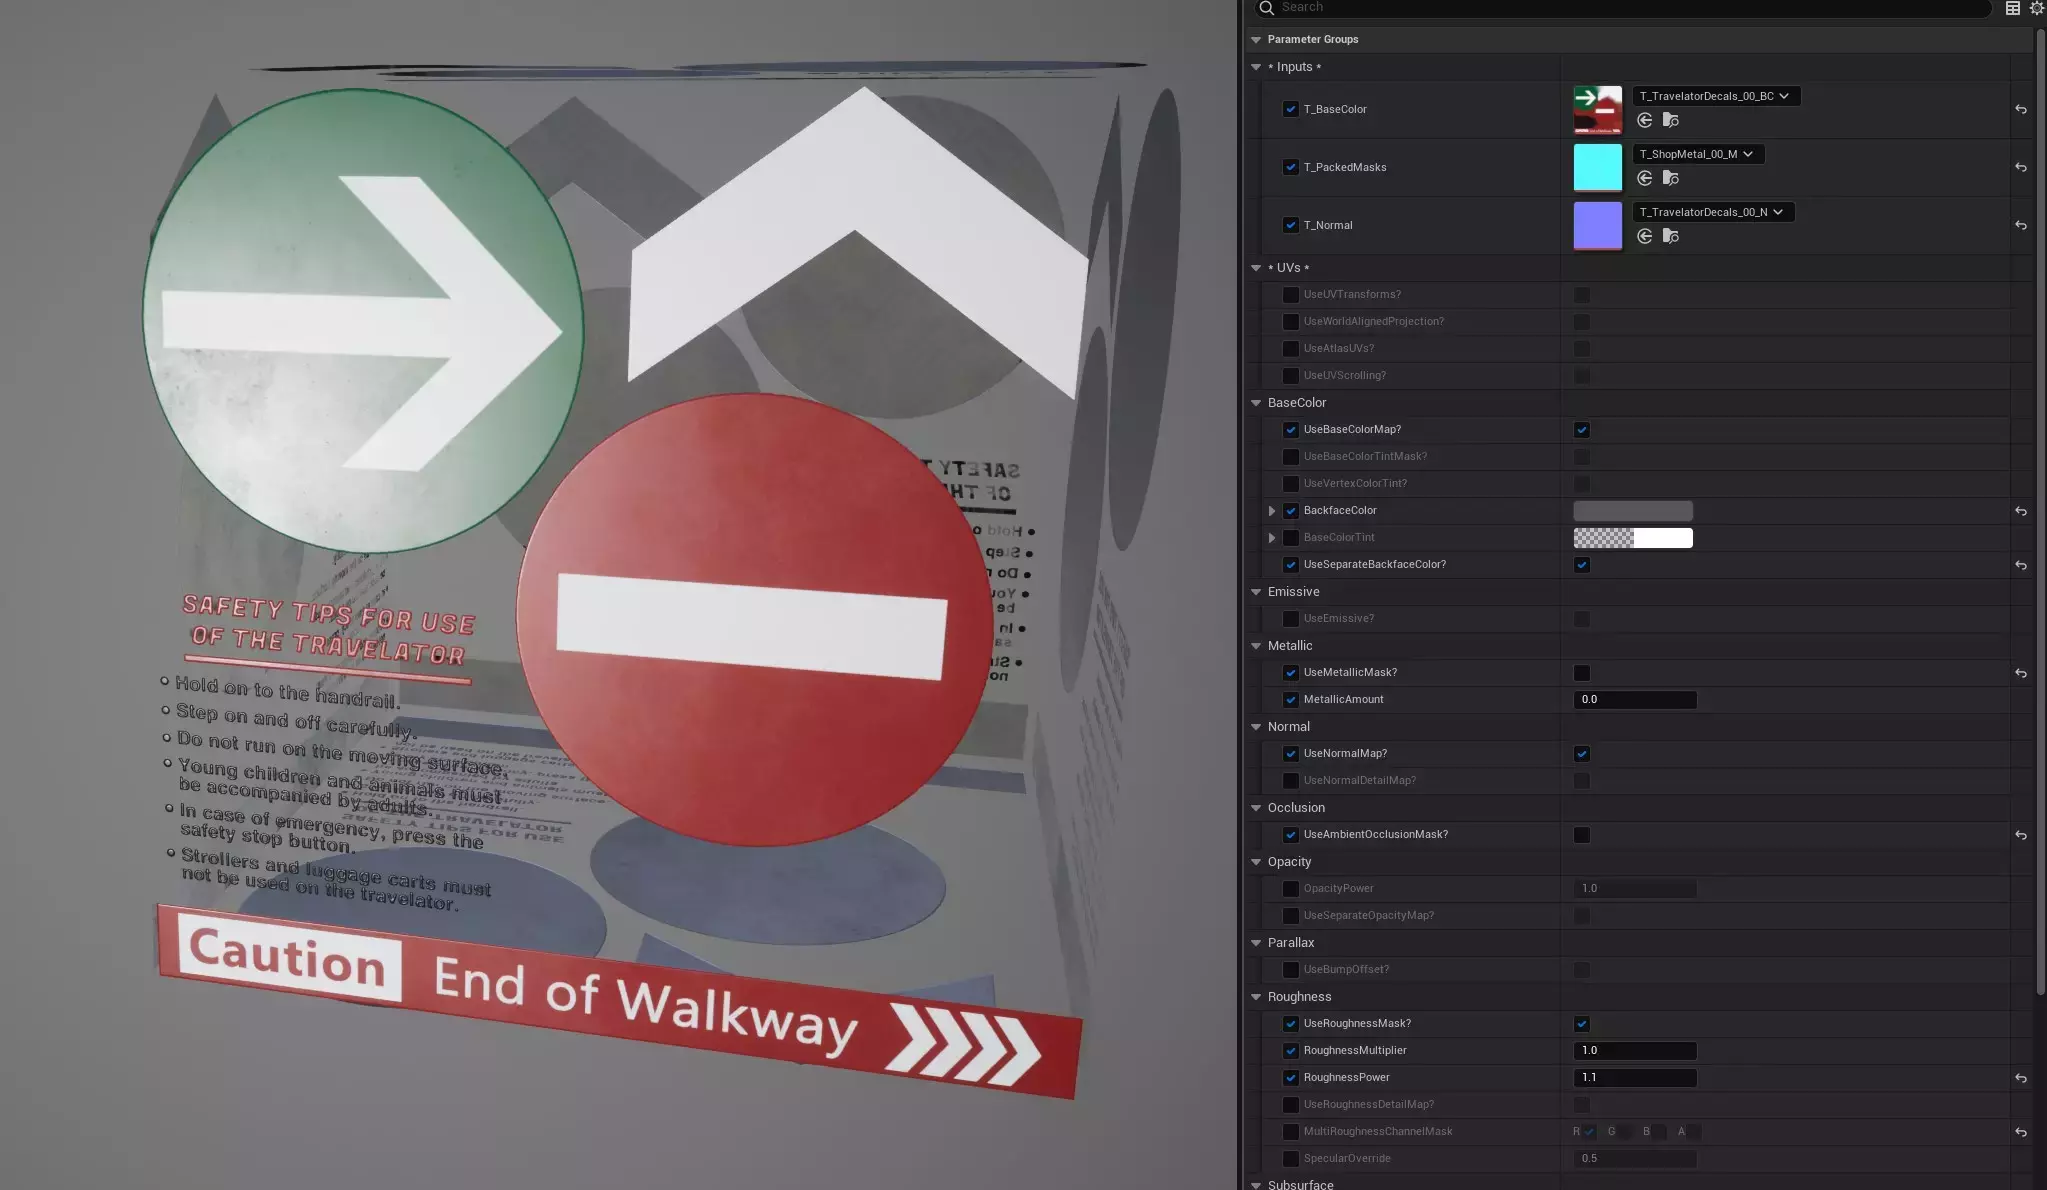
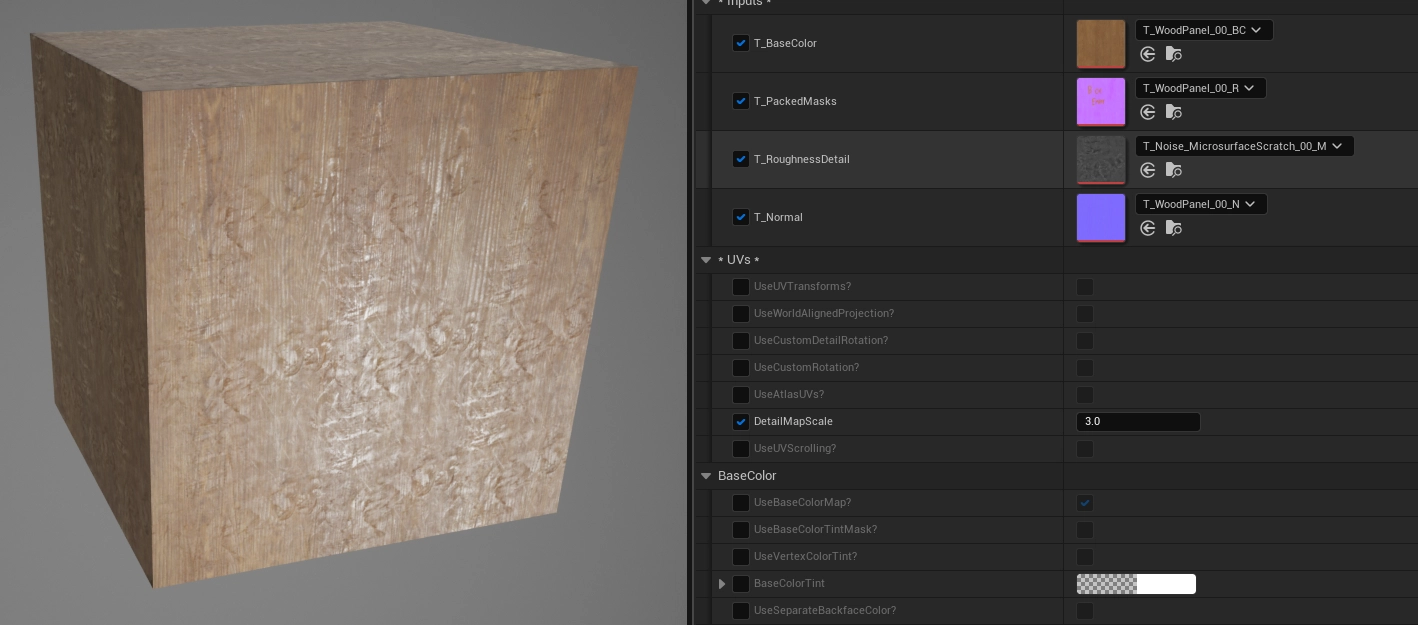
This base material setup was created to support most standard prop and world surfaces in an Unreal 4 based project, but the version demonstrated here was updated for Unreal 5 as well. Aside from being able to support materials for a wide range of surfaces, some of the key features are a set of standard UV controls, support for color tinting by material or vertex color, normal/microsurface detail layering, UV animation, and atlas/sub-UV unpacking.
In the project for which it was originally created, it served as the basis for most instanced materials, including those for character and first person weapon assets. Ultimately, I tried to keep things both organized and extensible with the ideas that new features or requirements could be incorporated later, or easily branched into a new derivative material if necessary. For instance, the project uses separate materials for decals, glass (translucency), and vertex blend materials, which each incorporate some of the functions created to drive this base material.
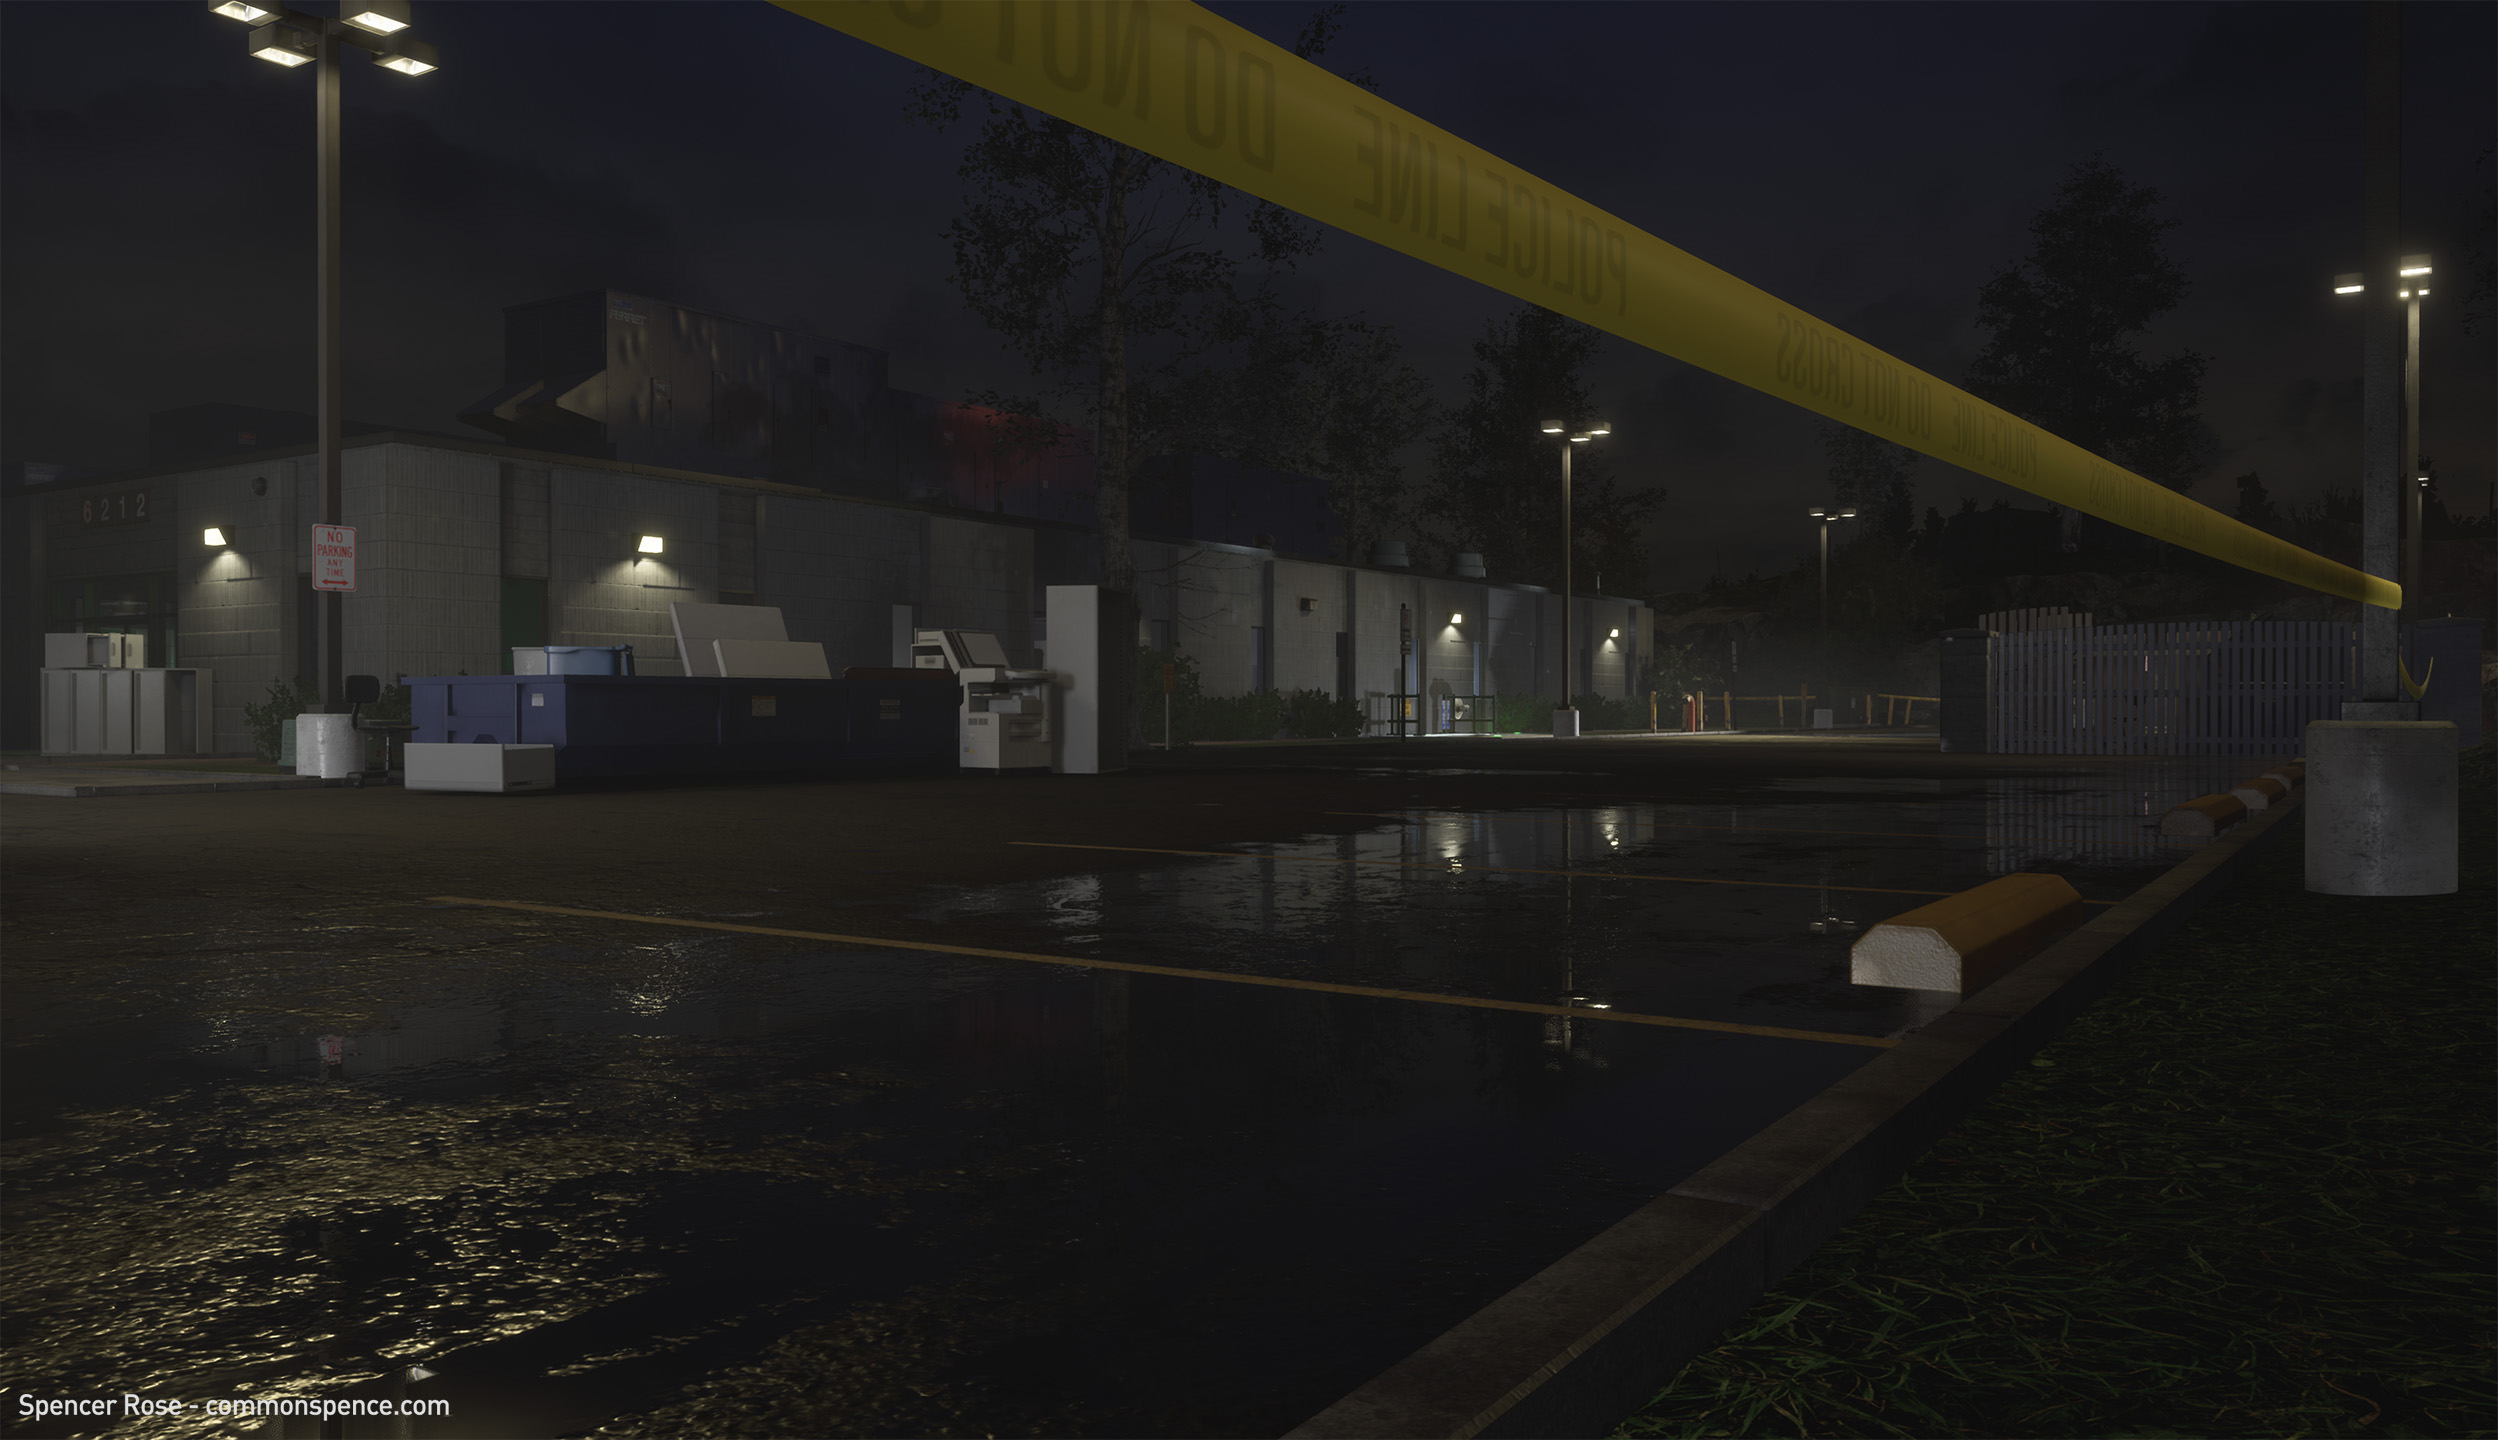
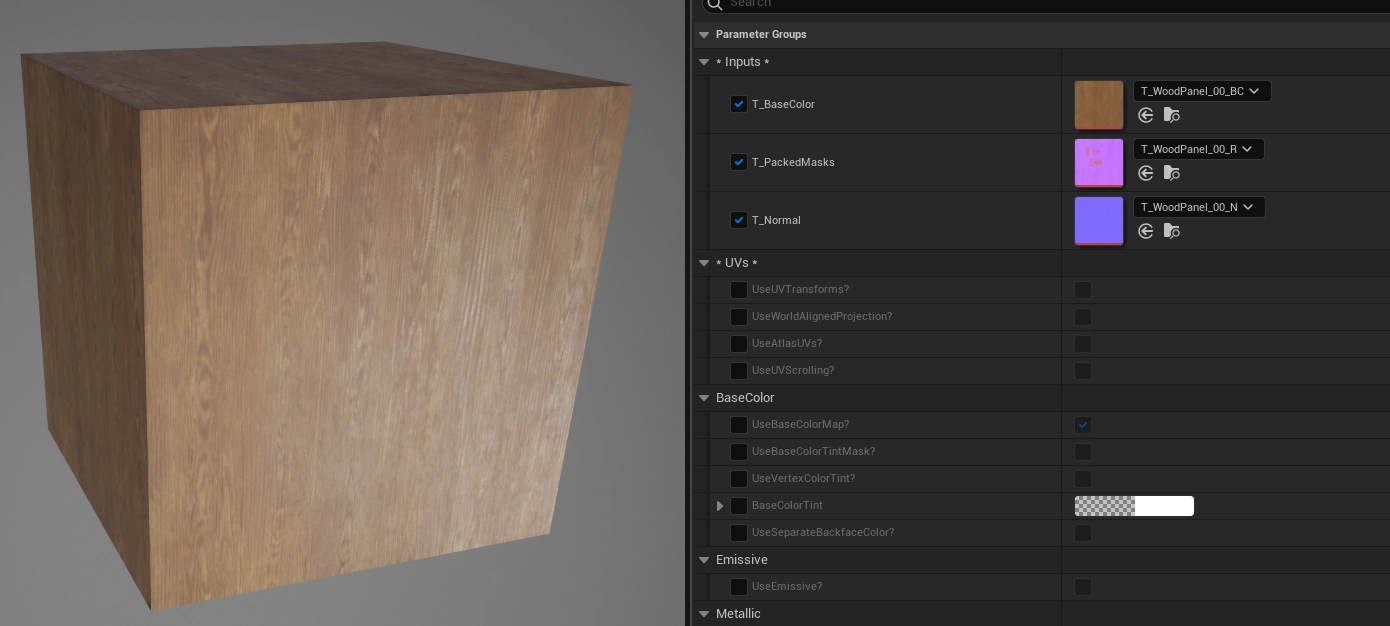
For assets of different material types, the only requirement for artists was to stick to an established Substance Painter workflow rather than having to do a lot of heavy work on the material side in-engine. The selected assets and scenes below demonstrate the material setup in action.

Full Material Graph
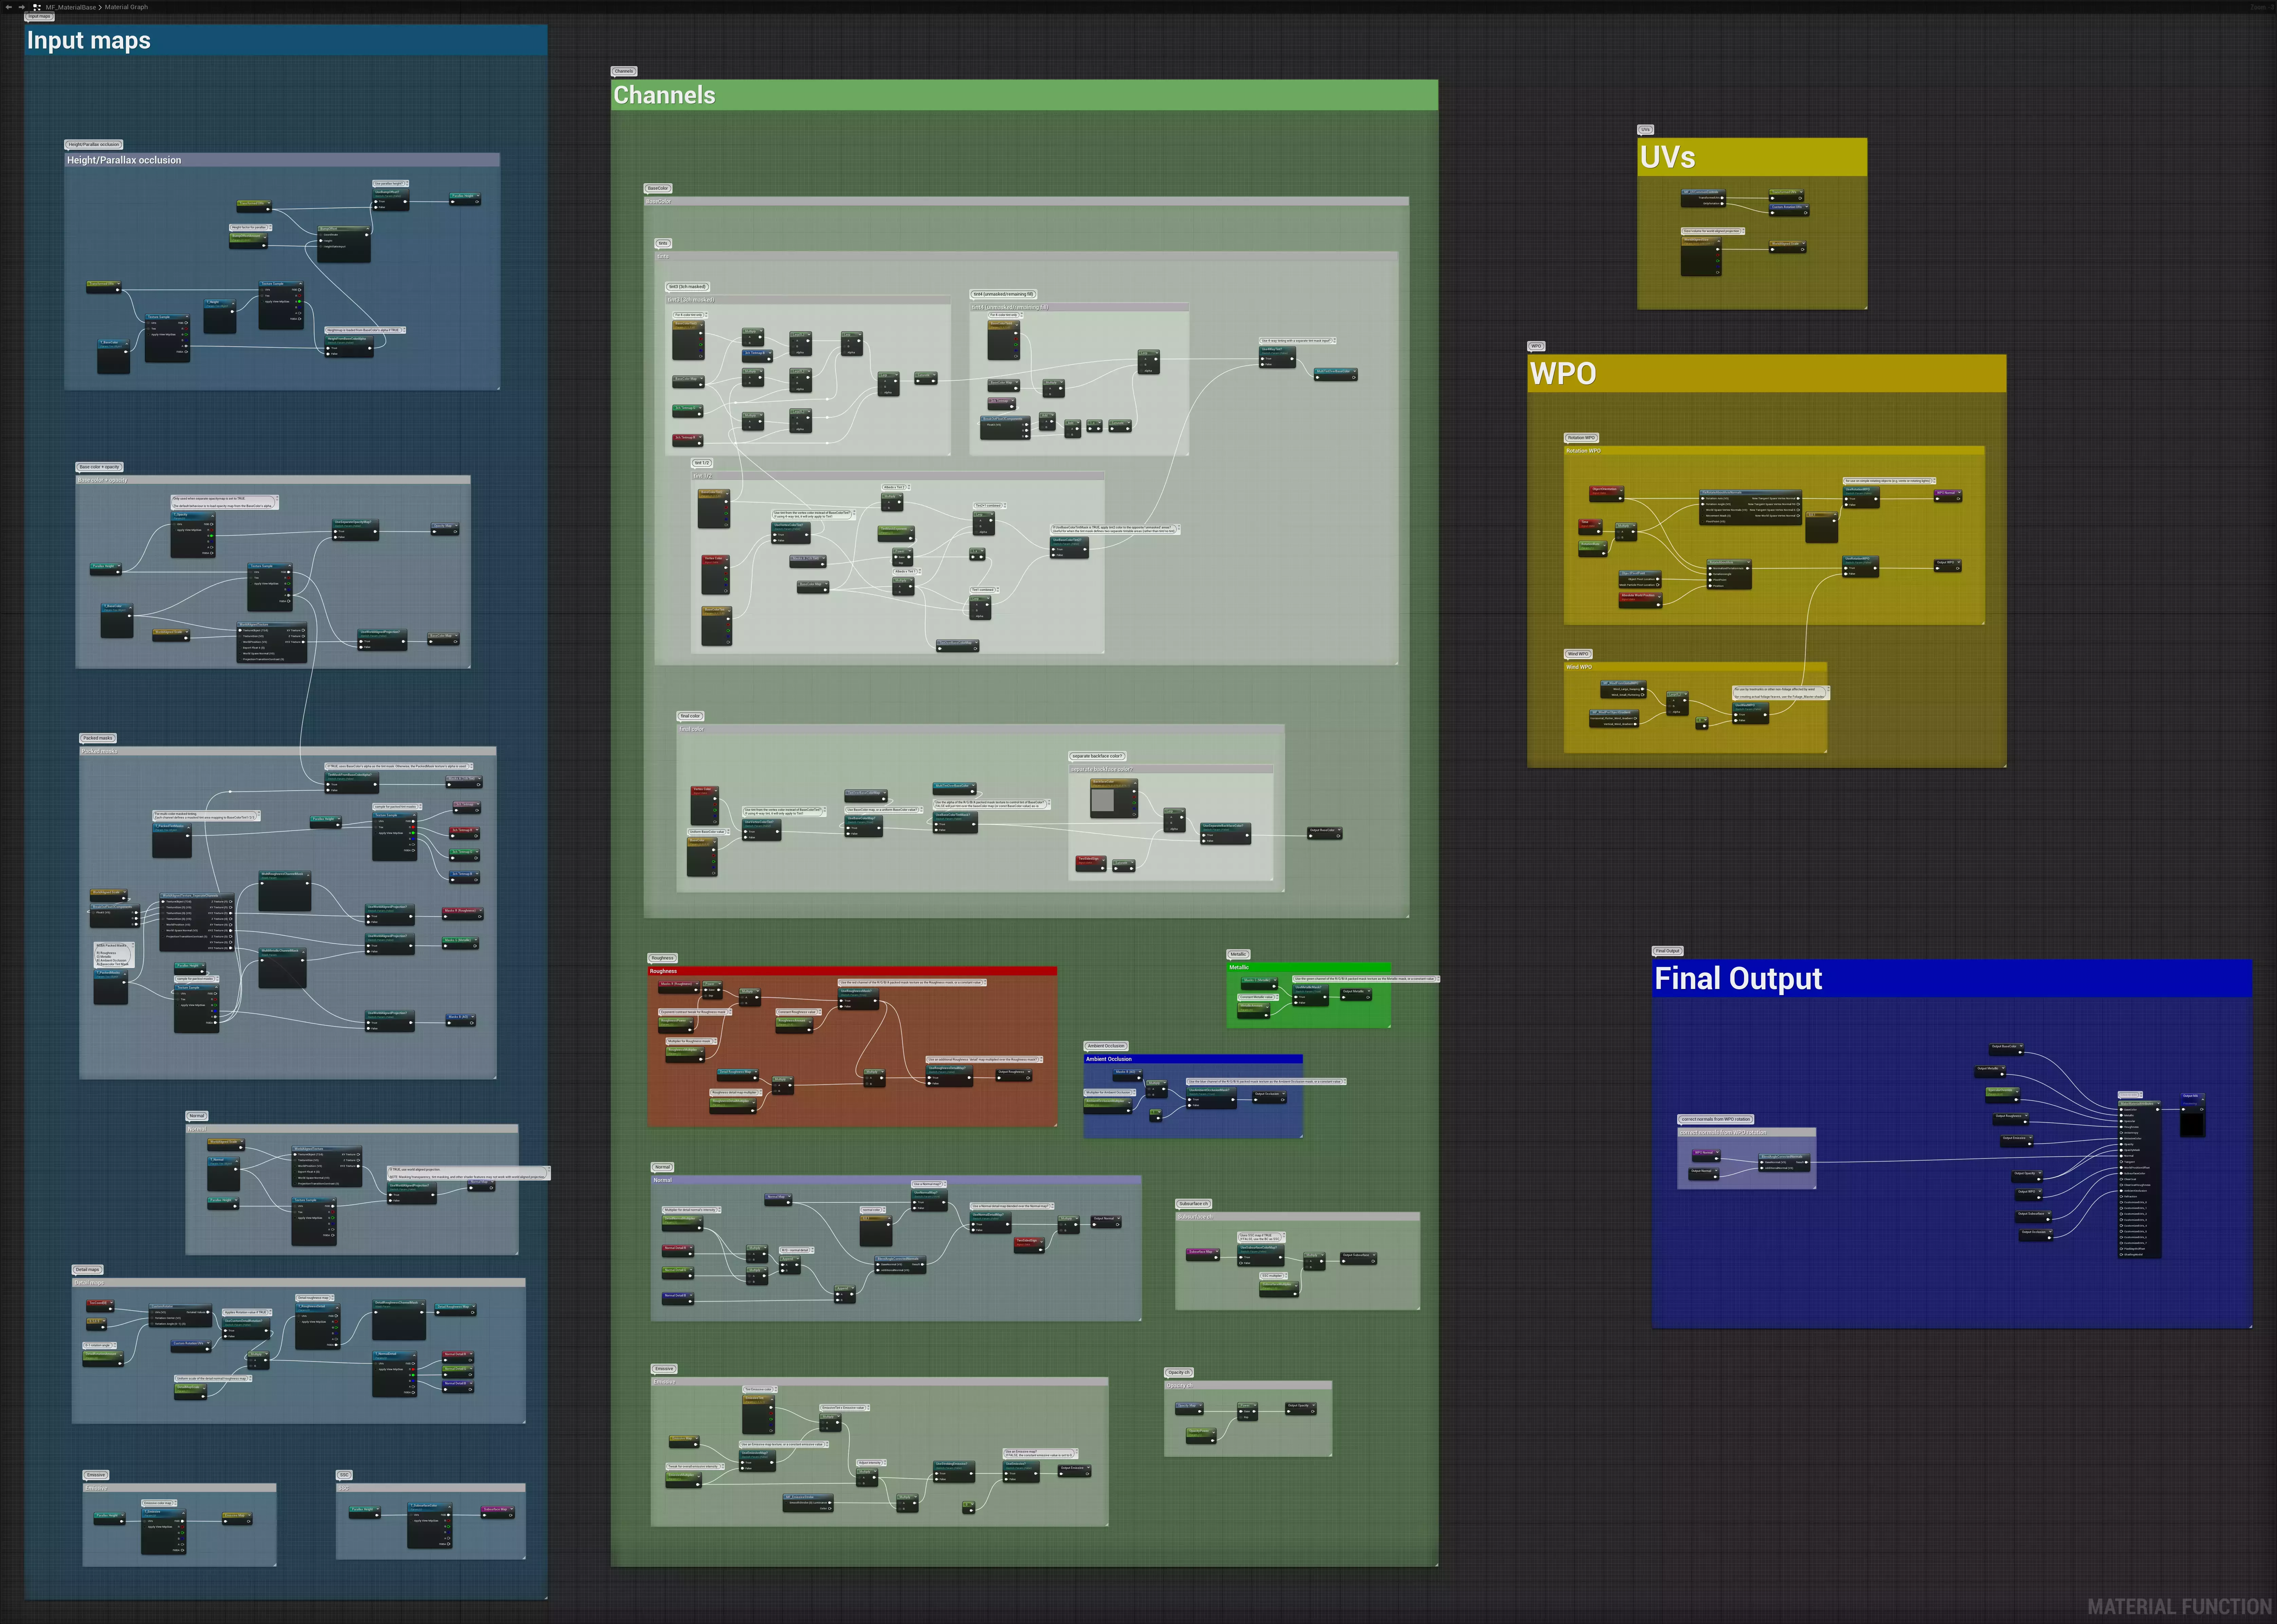
Clicking any of the graph screenshots on this page will open them in a new window/tab.
UV Controls
Transforms
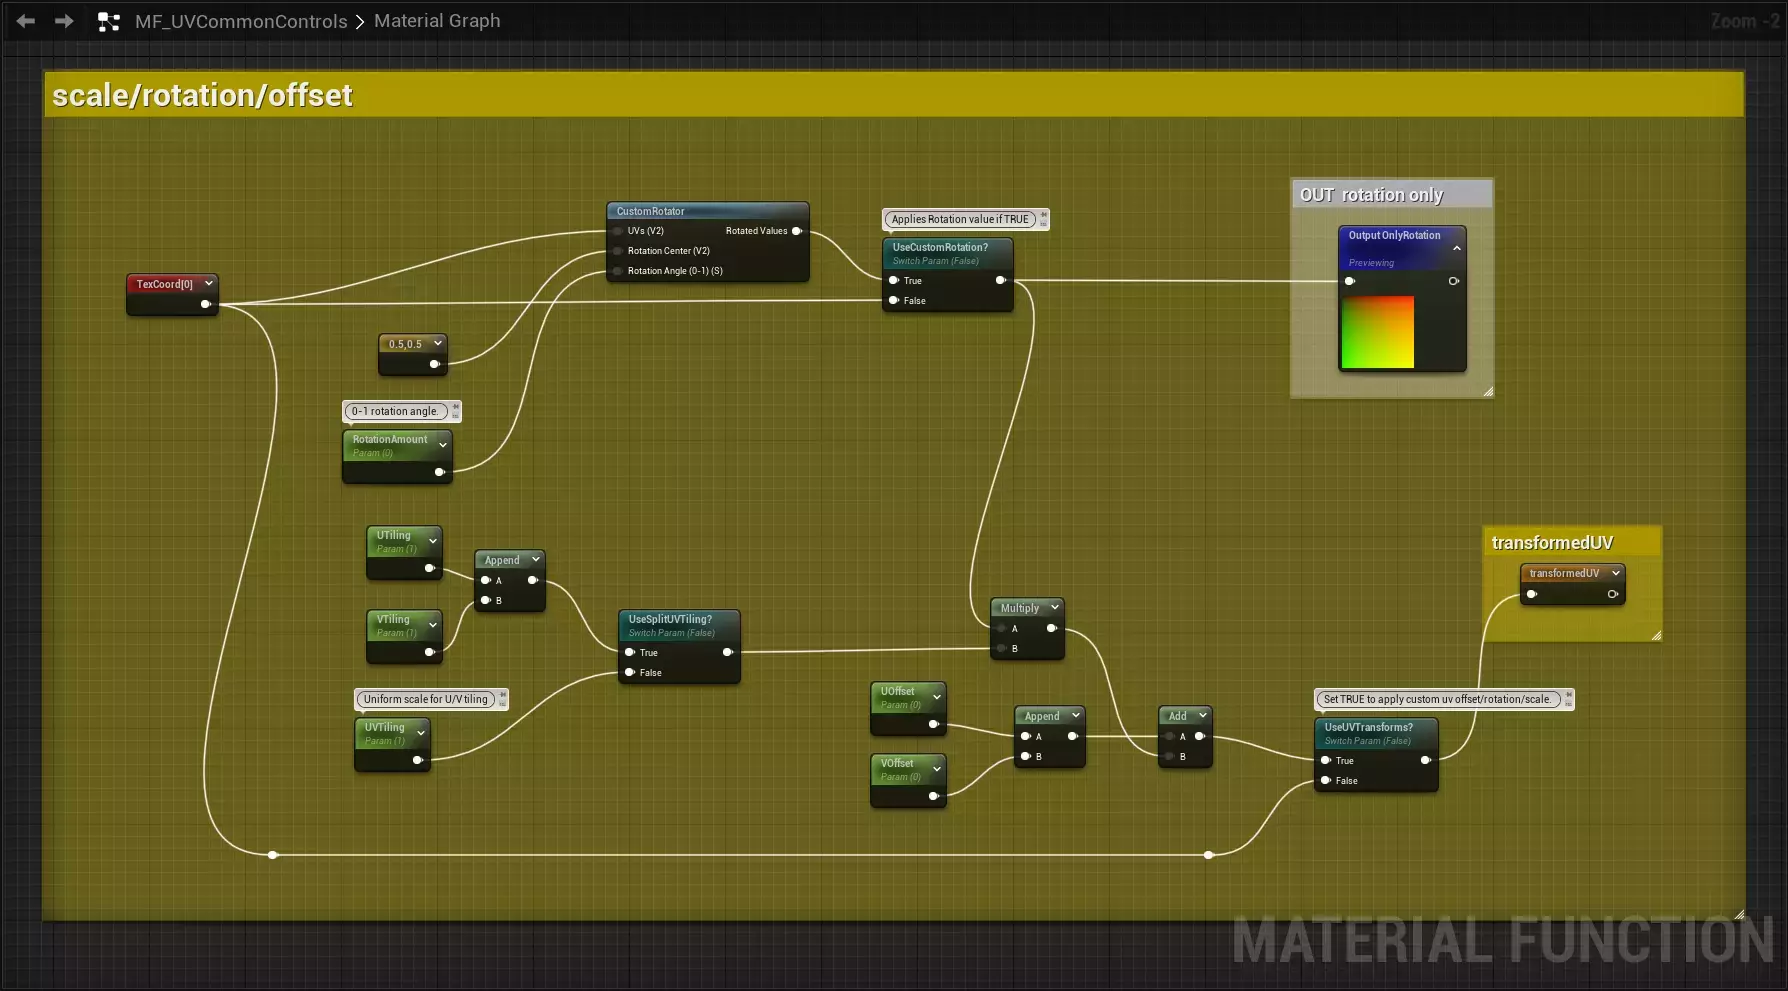
Controls for common, UV related operations are provided in a separate material function, allowing it to be reused in other material graphs.
The first part of this function handles rotation, scale, and offset adjustments.
Animation
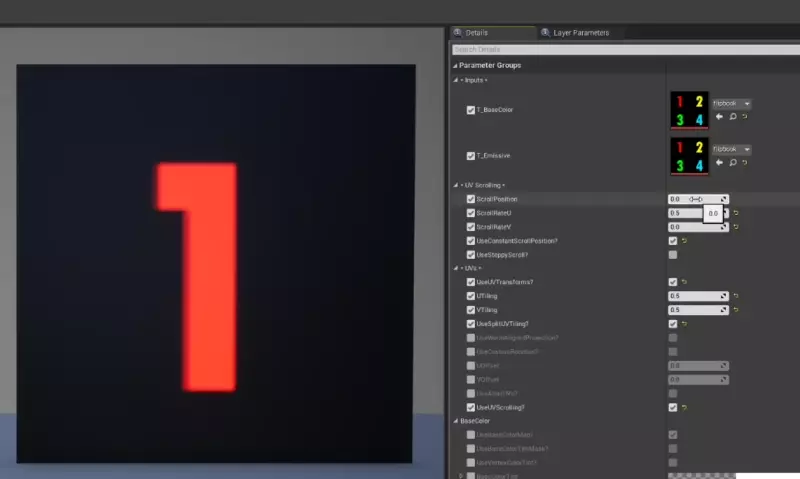
The next part of the UV controls function handles scrolling UV animation. As it is a UV-based effect, it applies to all channels (normal, packed masks, emissive, etc). It also stacks on top of the UV transforms from the previous section of the material function.
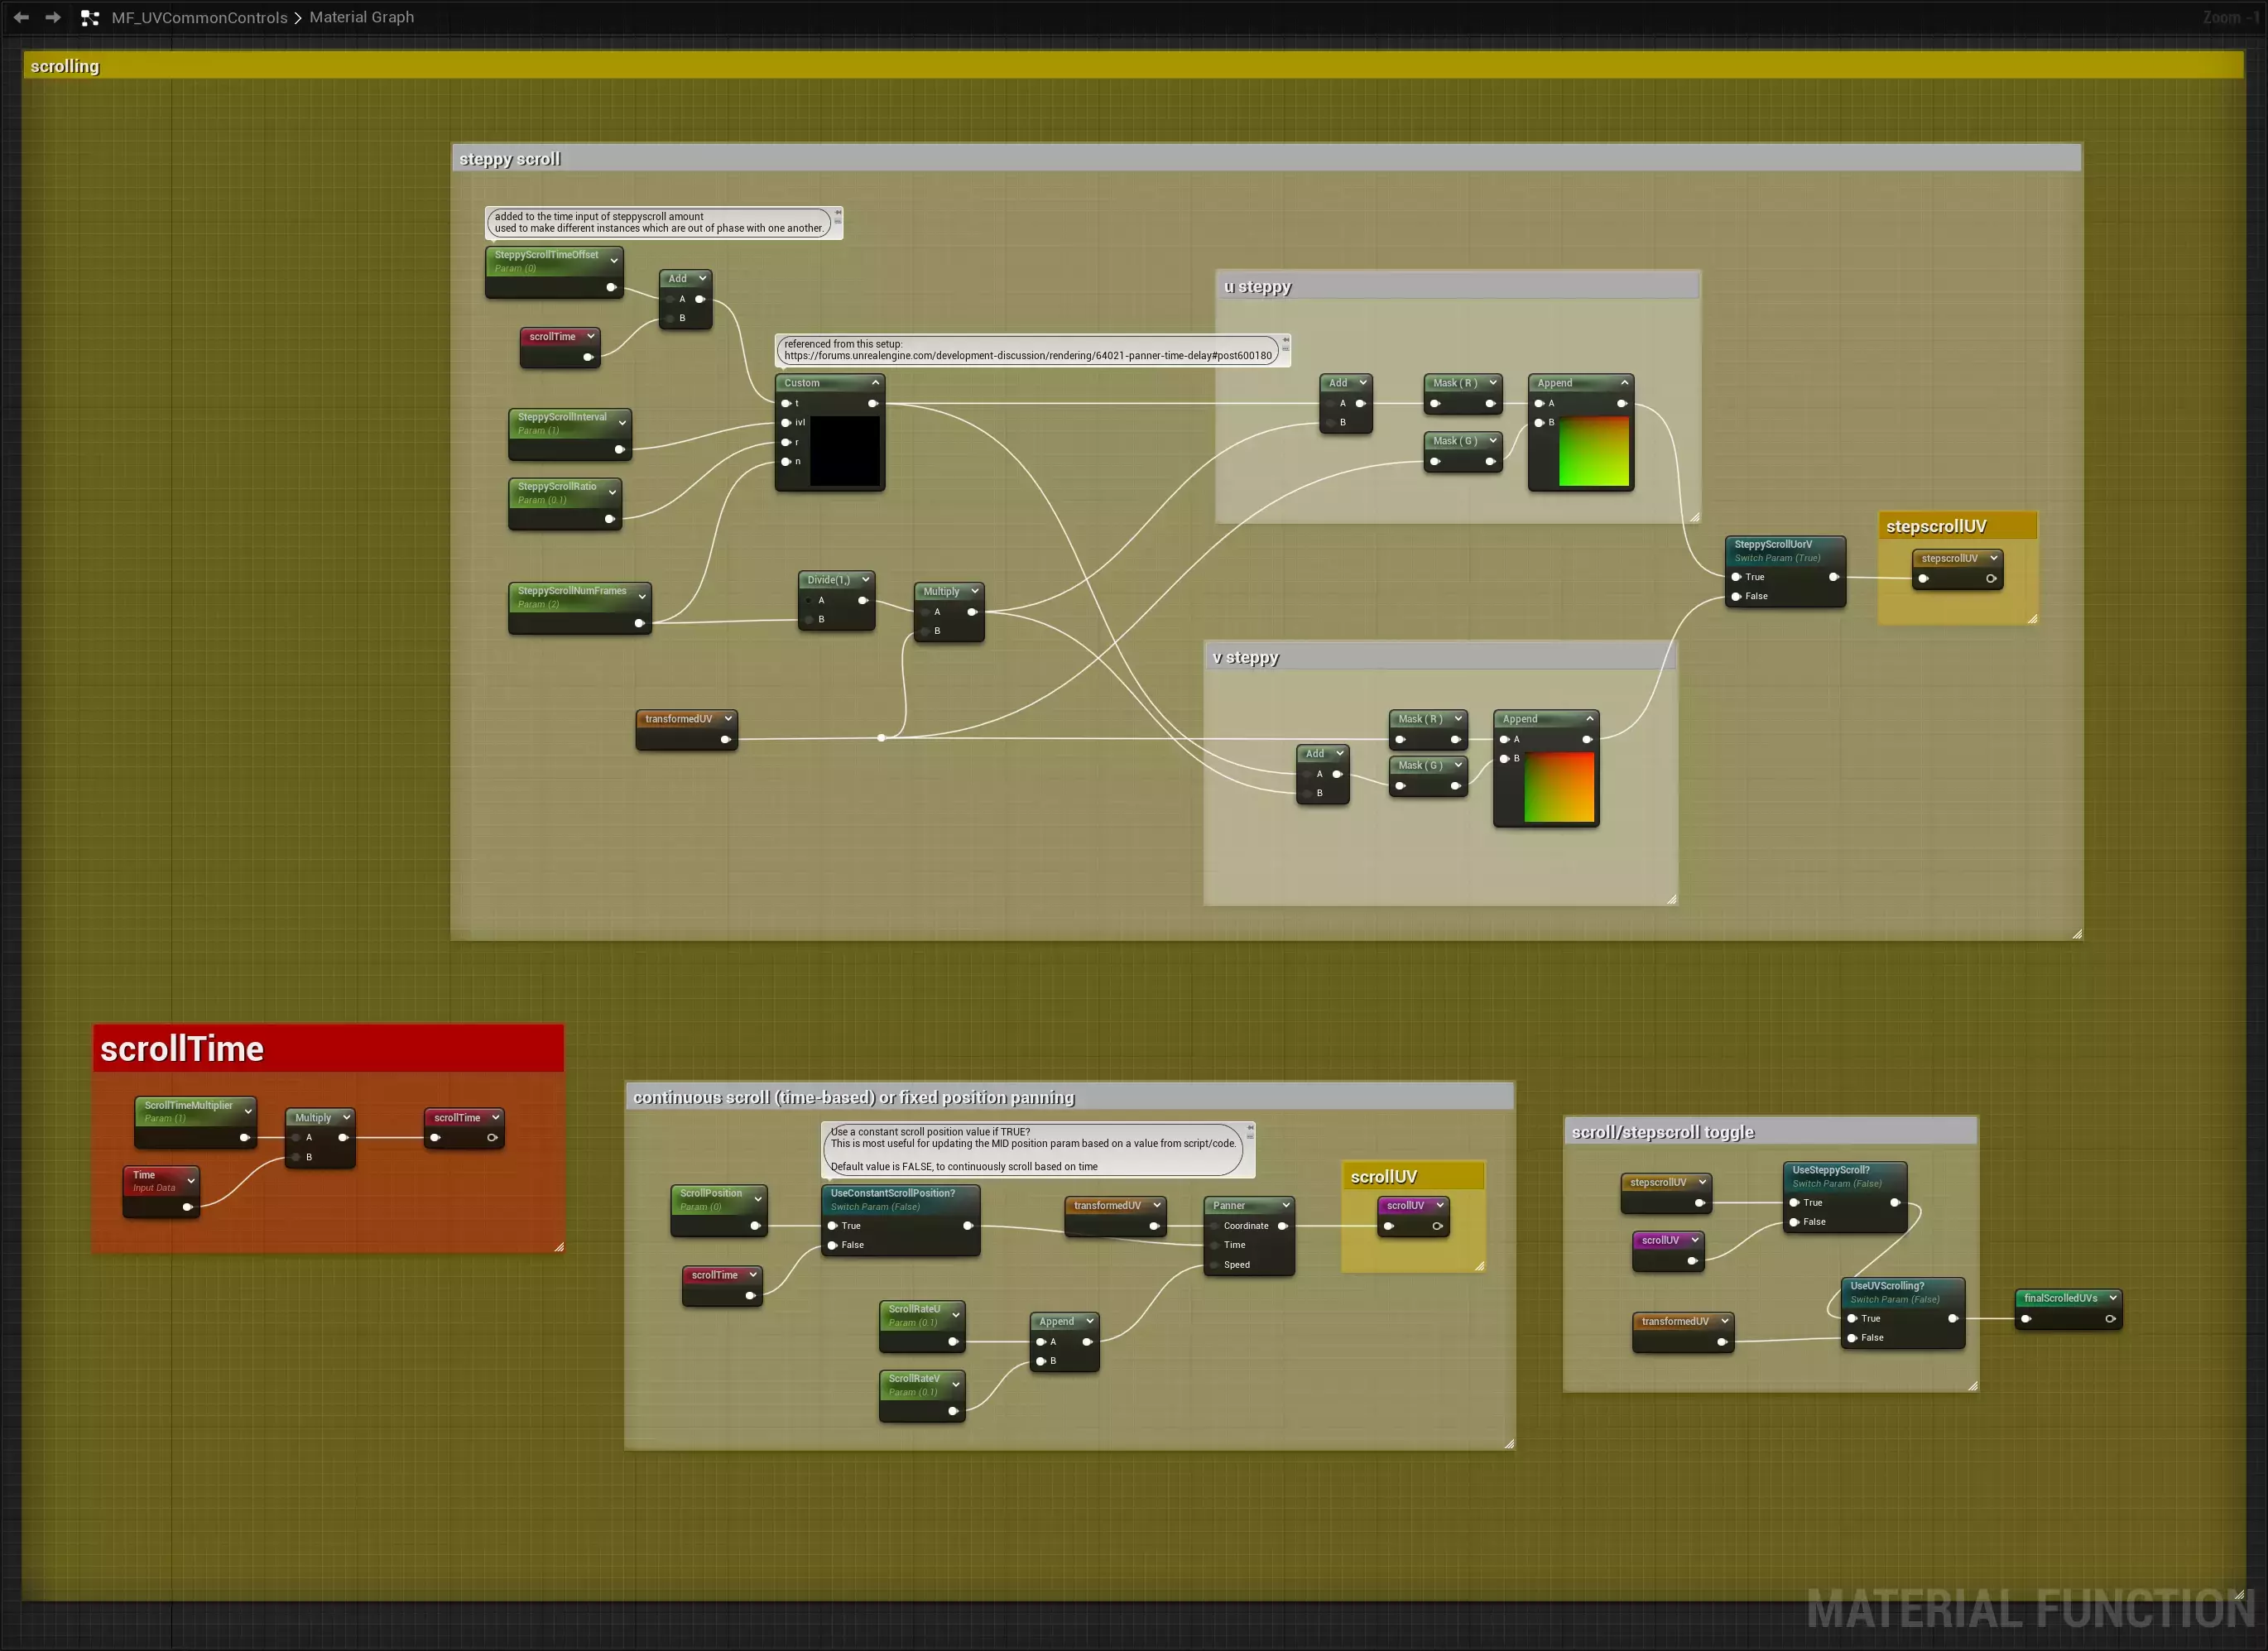
Two methods of scrolling are supported. The basic method scrolls continuously, or to a specific position based on a constant value.
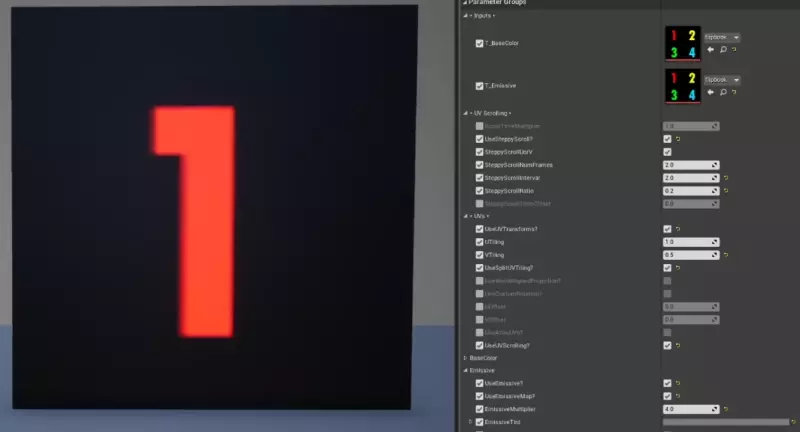
The alternate method applies a pause in between scroll phases, which was initially implemented for scrolling adverts. This is mostly handled with a custom expression node (sourced from a similar solution shared on the Unreal Forums by users xnihil0zer0 and Kajiisan).
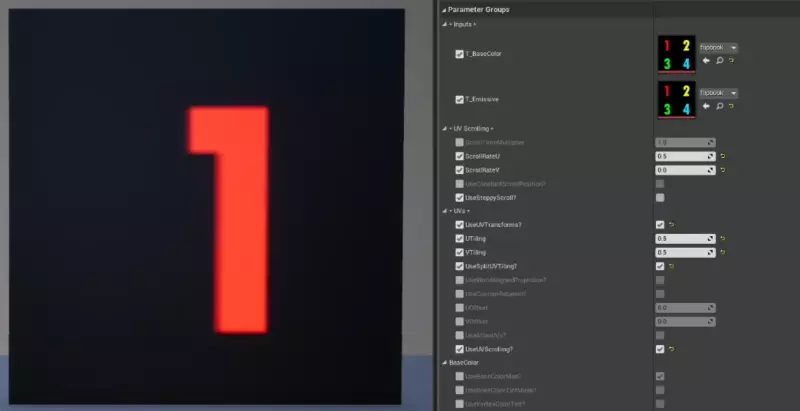
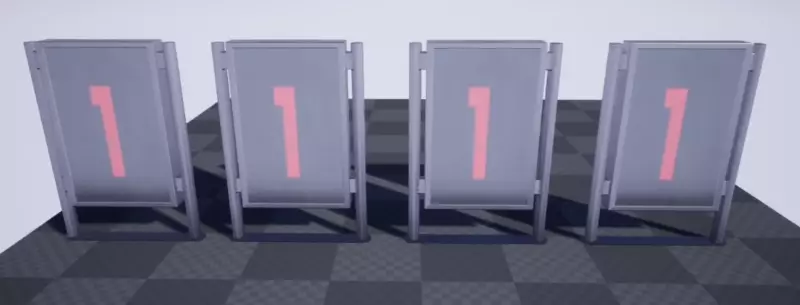
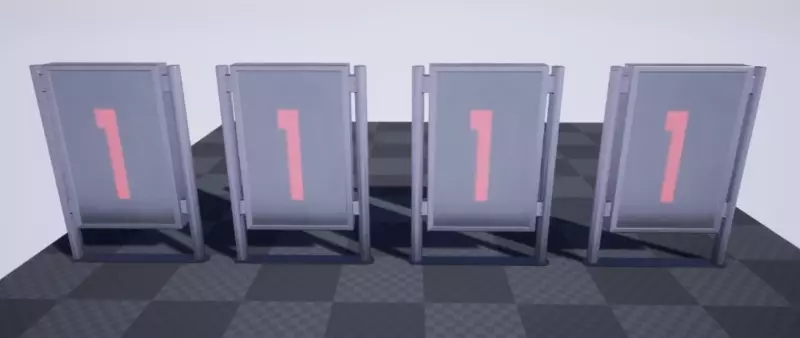
The time value can be further modified by an offset, so that the same texture can be used on multiple material instances within a scene, but moving at different phases and speeds. The second set of material instances each has a different offset value.
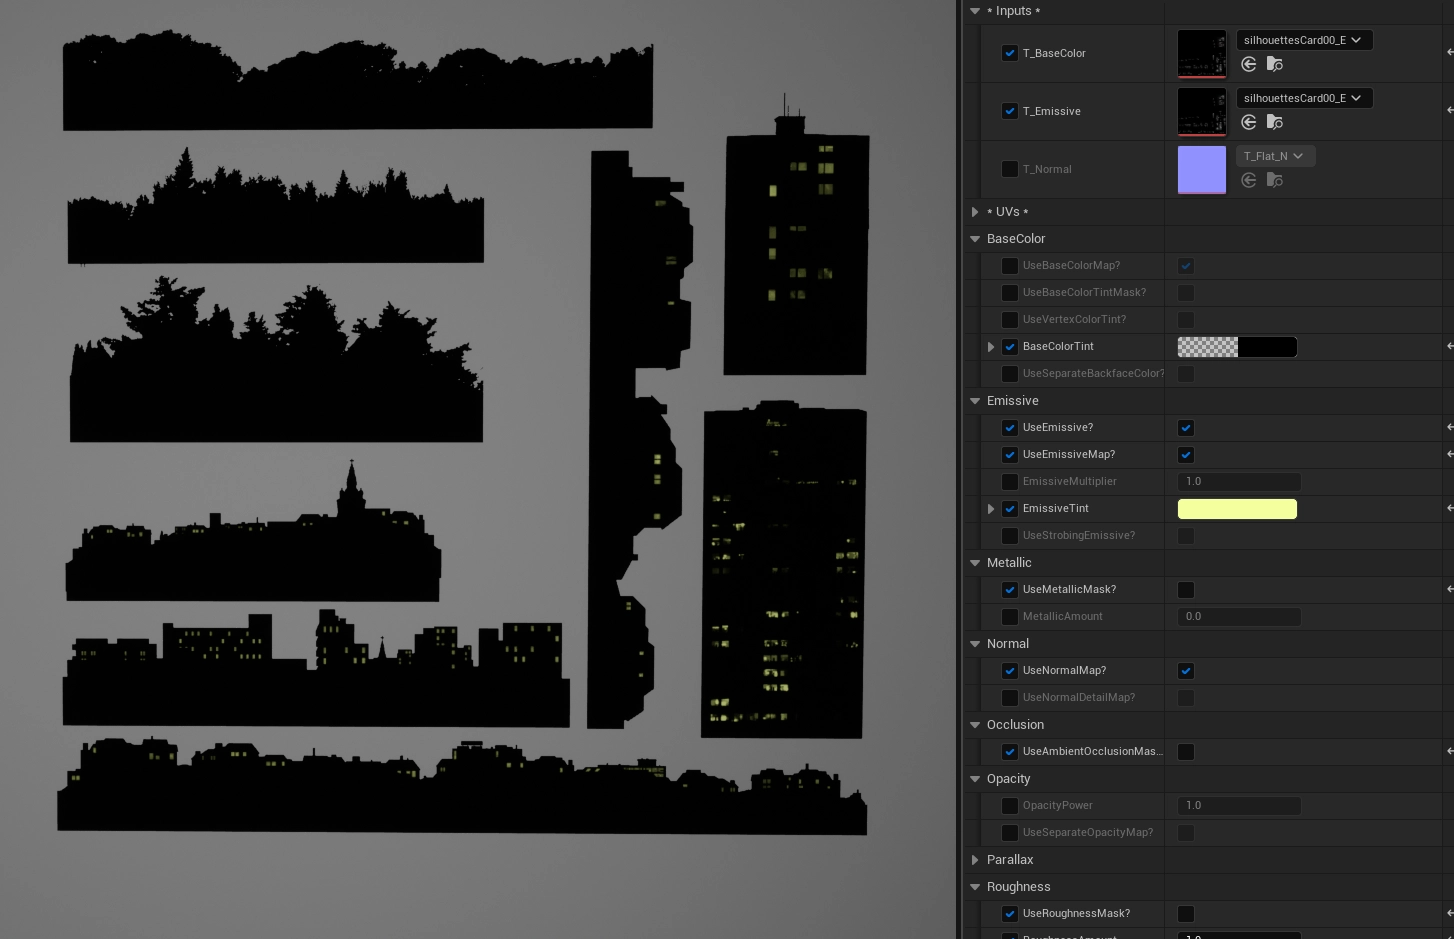
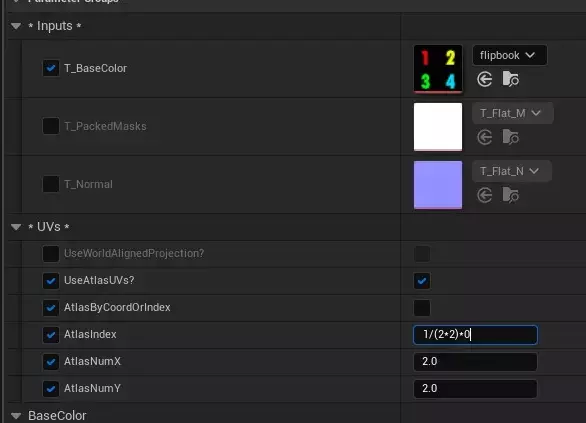
Atlas/Sub-UV Unpacking
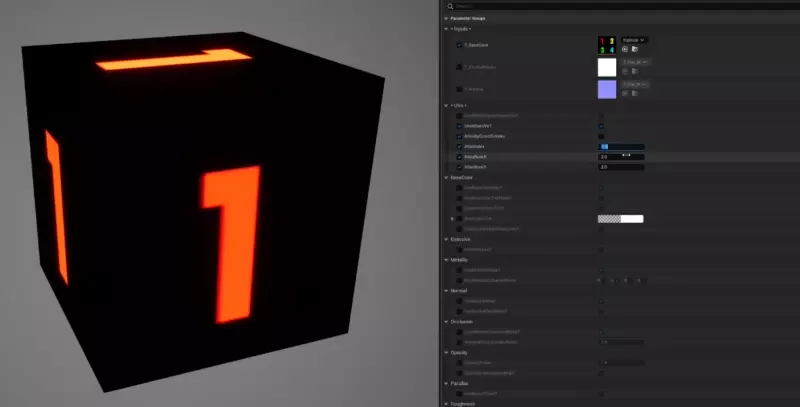
The last part of the UV control function handles atlas "unpacking" - transforming a smaller portion of the material to the 0-1 UV space. This was primarily used for variations on signs, small detail models, or other applications (like randomized decals).
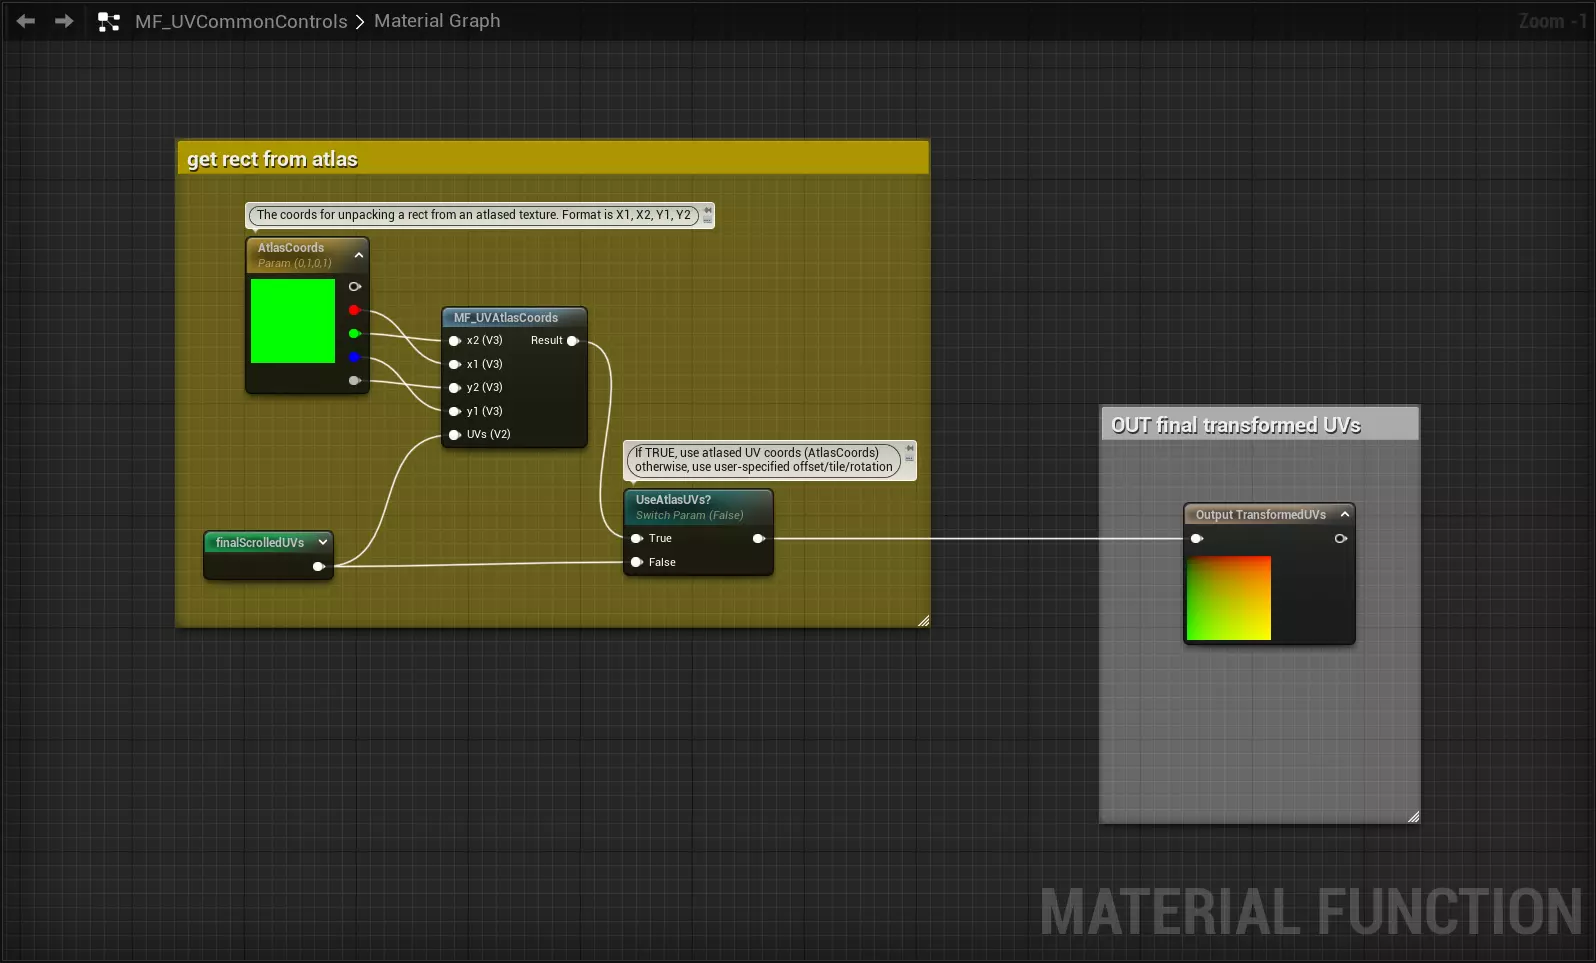
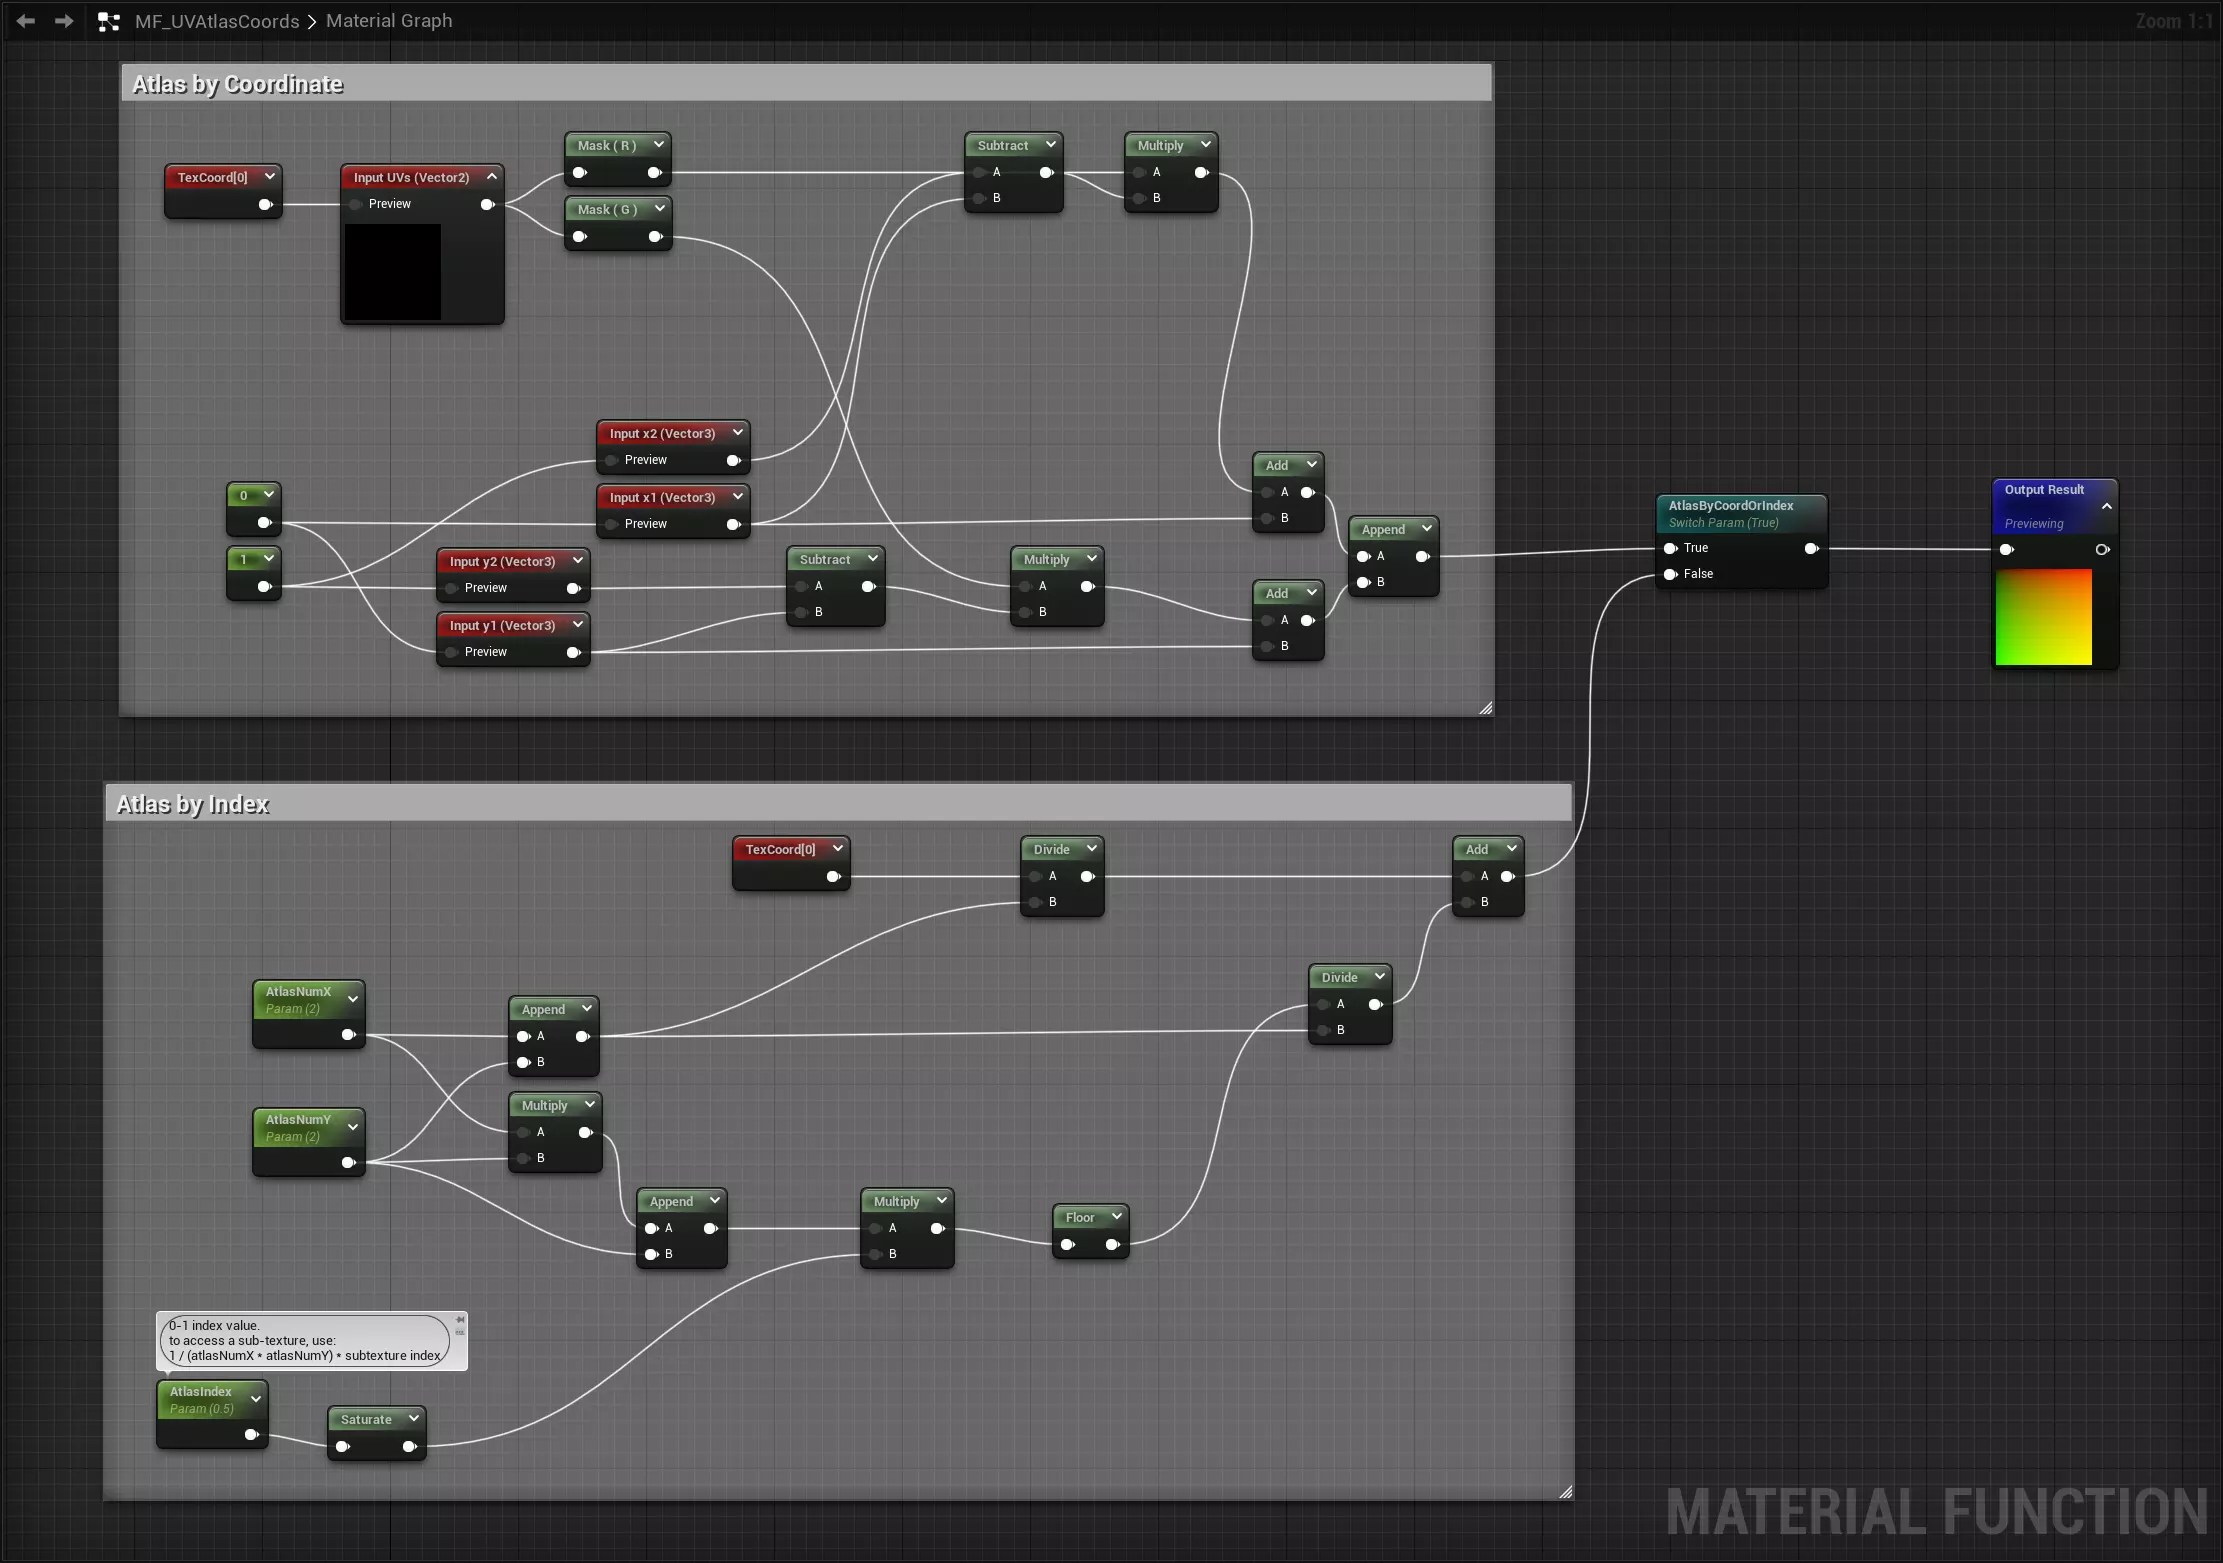
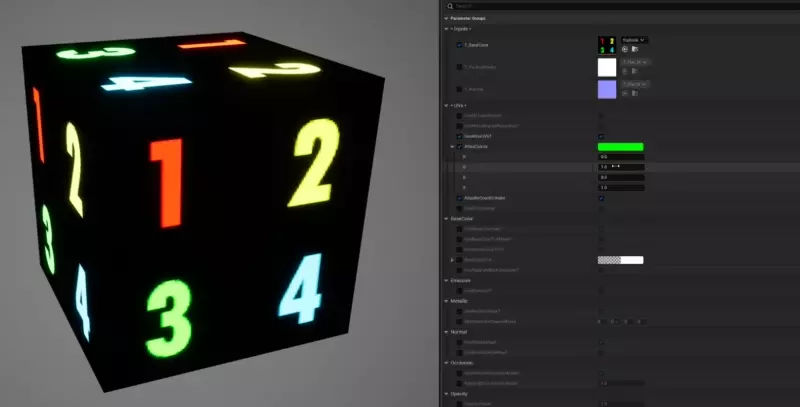
Two methods of atlas unpacking are supported, "by coordinate" and "by index". The coordinate method, shown above, treats a Vector4 parameter as two coordinate pairs, [u1,u2] and [v1,v2], representing the min/max coordinates of the UV area to be "unpacked".
The index method was intended for larger, grid-like atlases with evenly spaced rows and columns. A primary use case was for assets like bullet holes or impact decal sheets, which could have a random cell selected from a larger grid where the cells are uniformly sized. The coordinates for any cell can be resolved automatically by the material when the count of rows and columns is known. Although the index parameter is in the 0-1 range, it's easy to find a specific sub-frame by index using the formula (1 / (numRows * numCols) * desiredIndex). Such expressions can even be entered in the material editor.
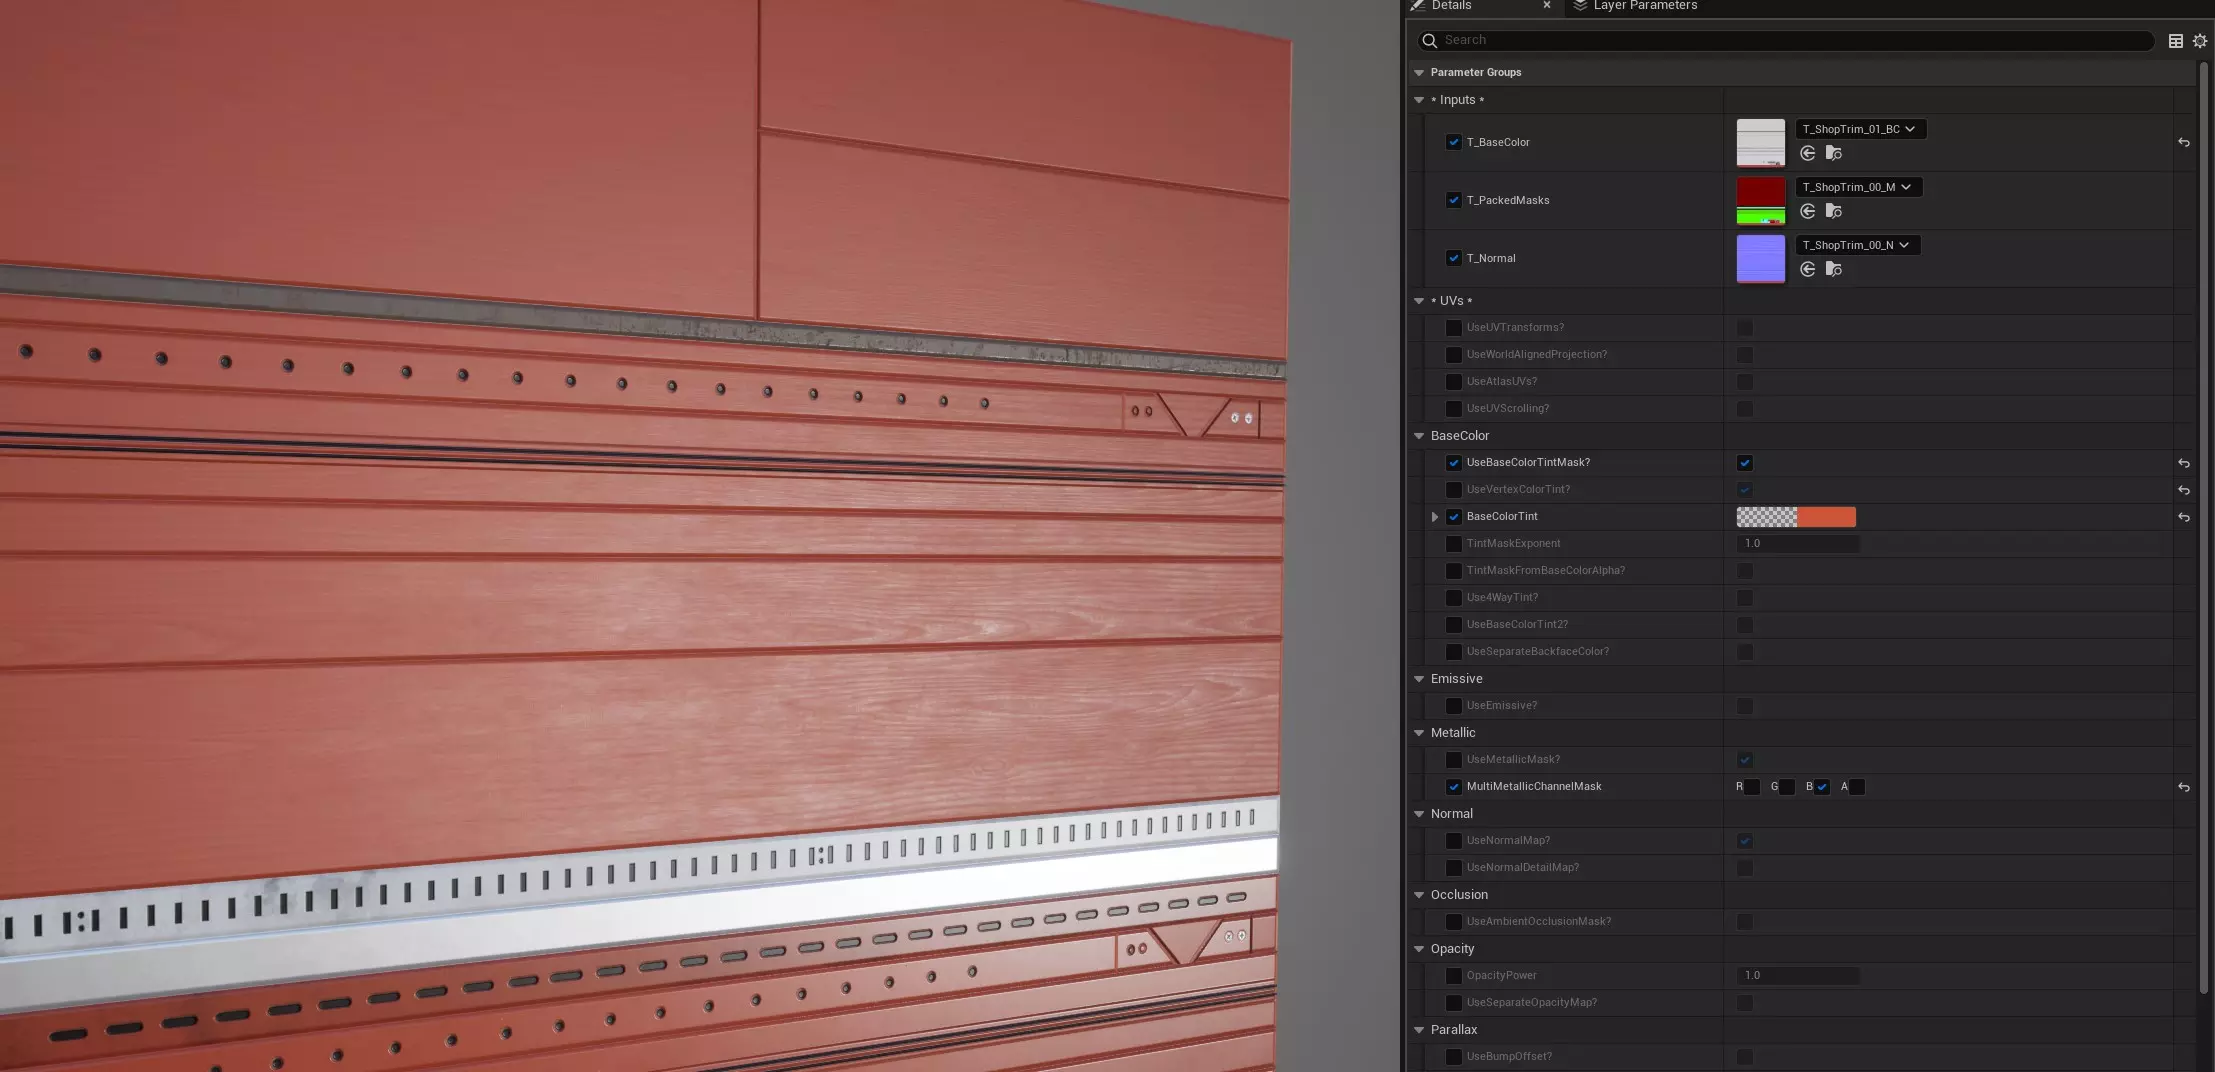
Color Tinting
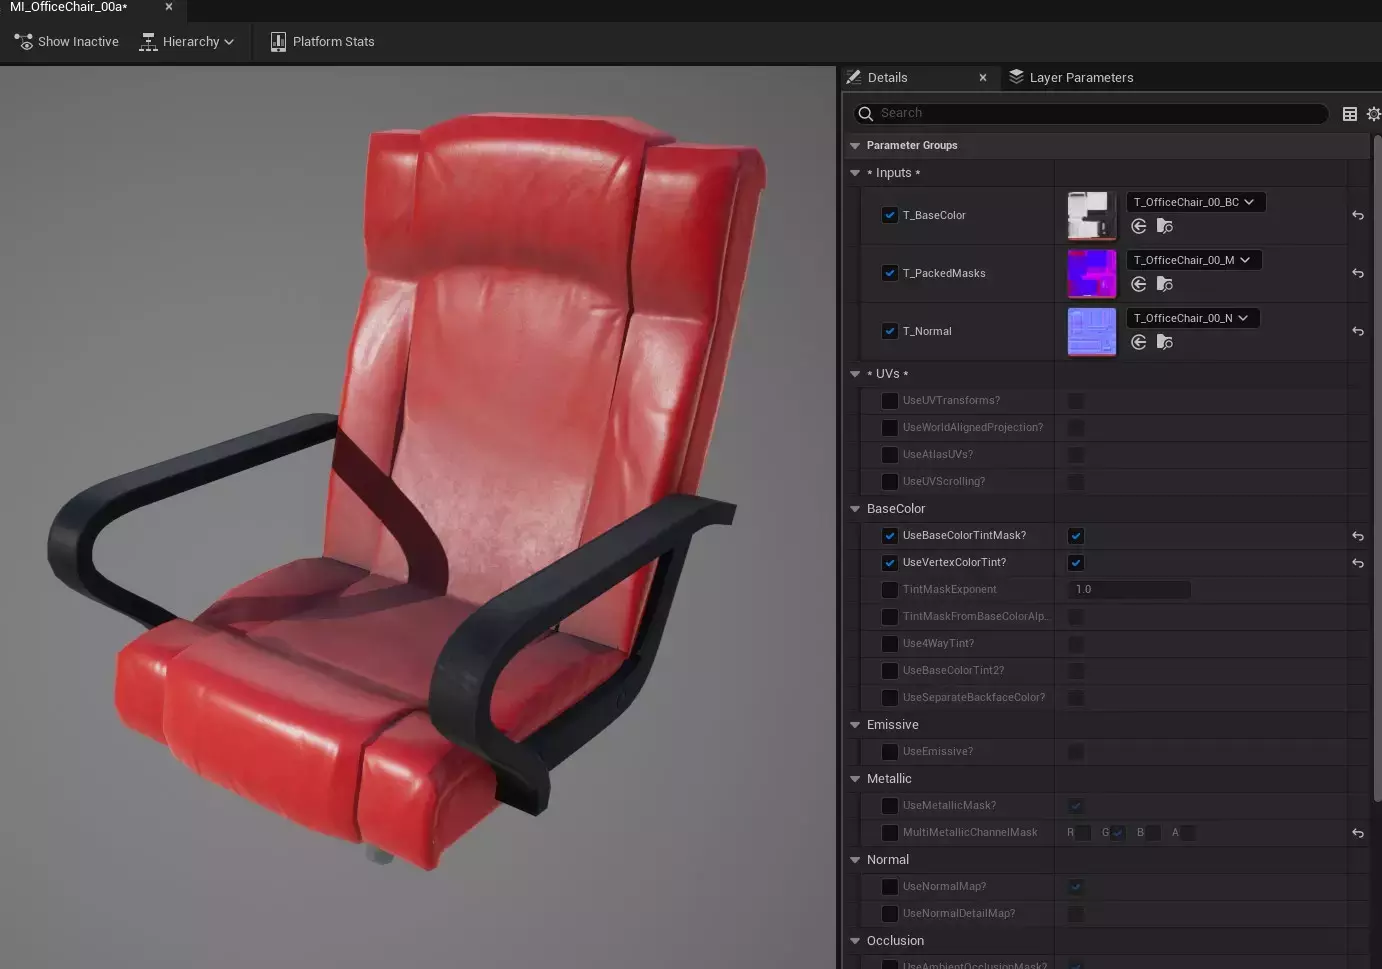
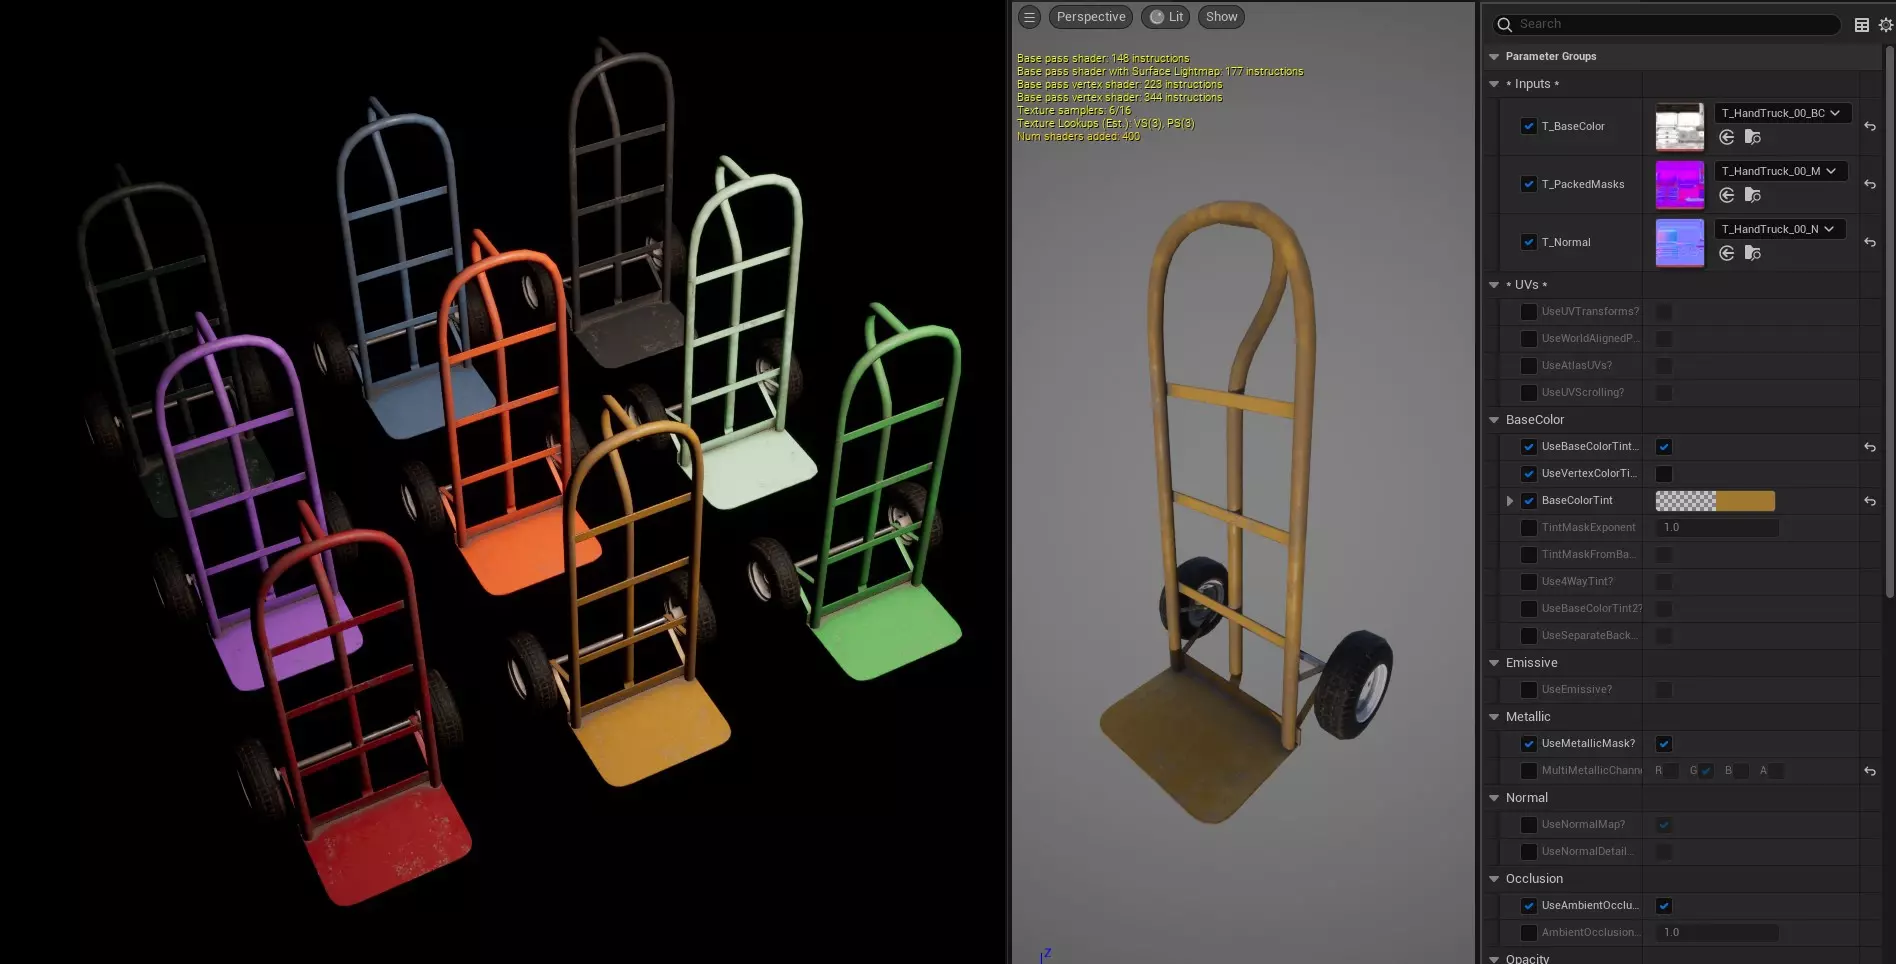
The color tint feature multiplies a color value over the basecolor - either over the entire material, or controlled by a mask. A constant color can be specified in the material, or colors can be sampled from the mesh's vertexcolors.
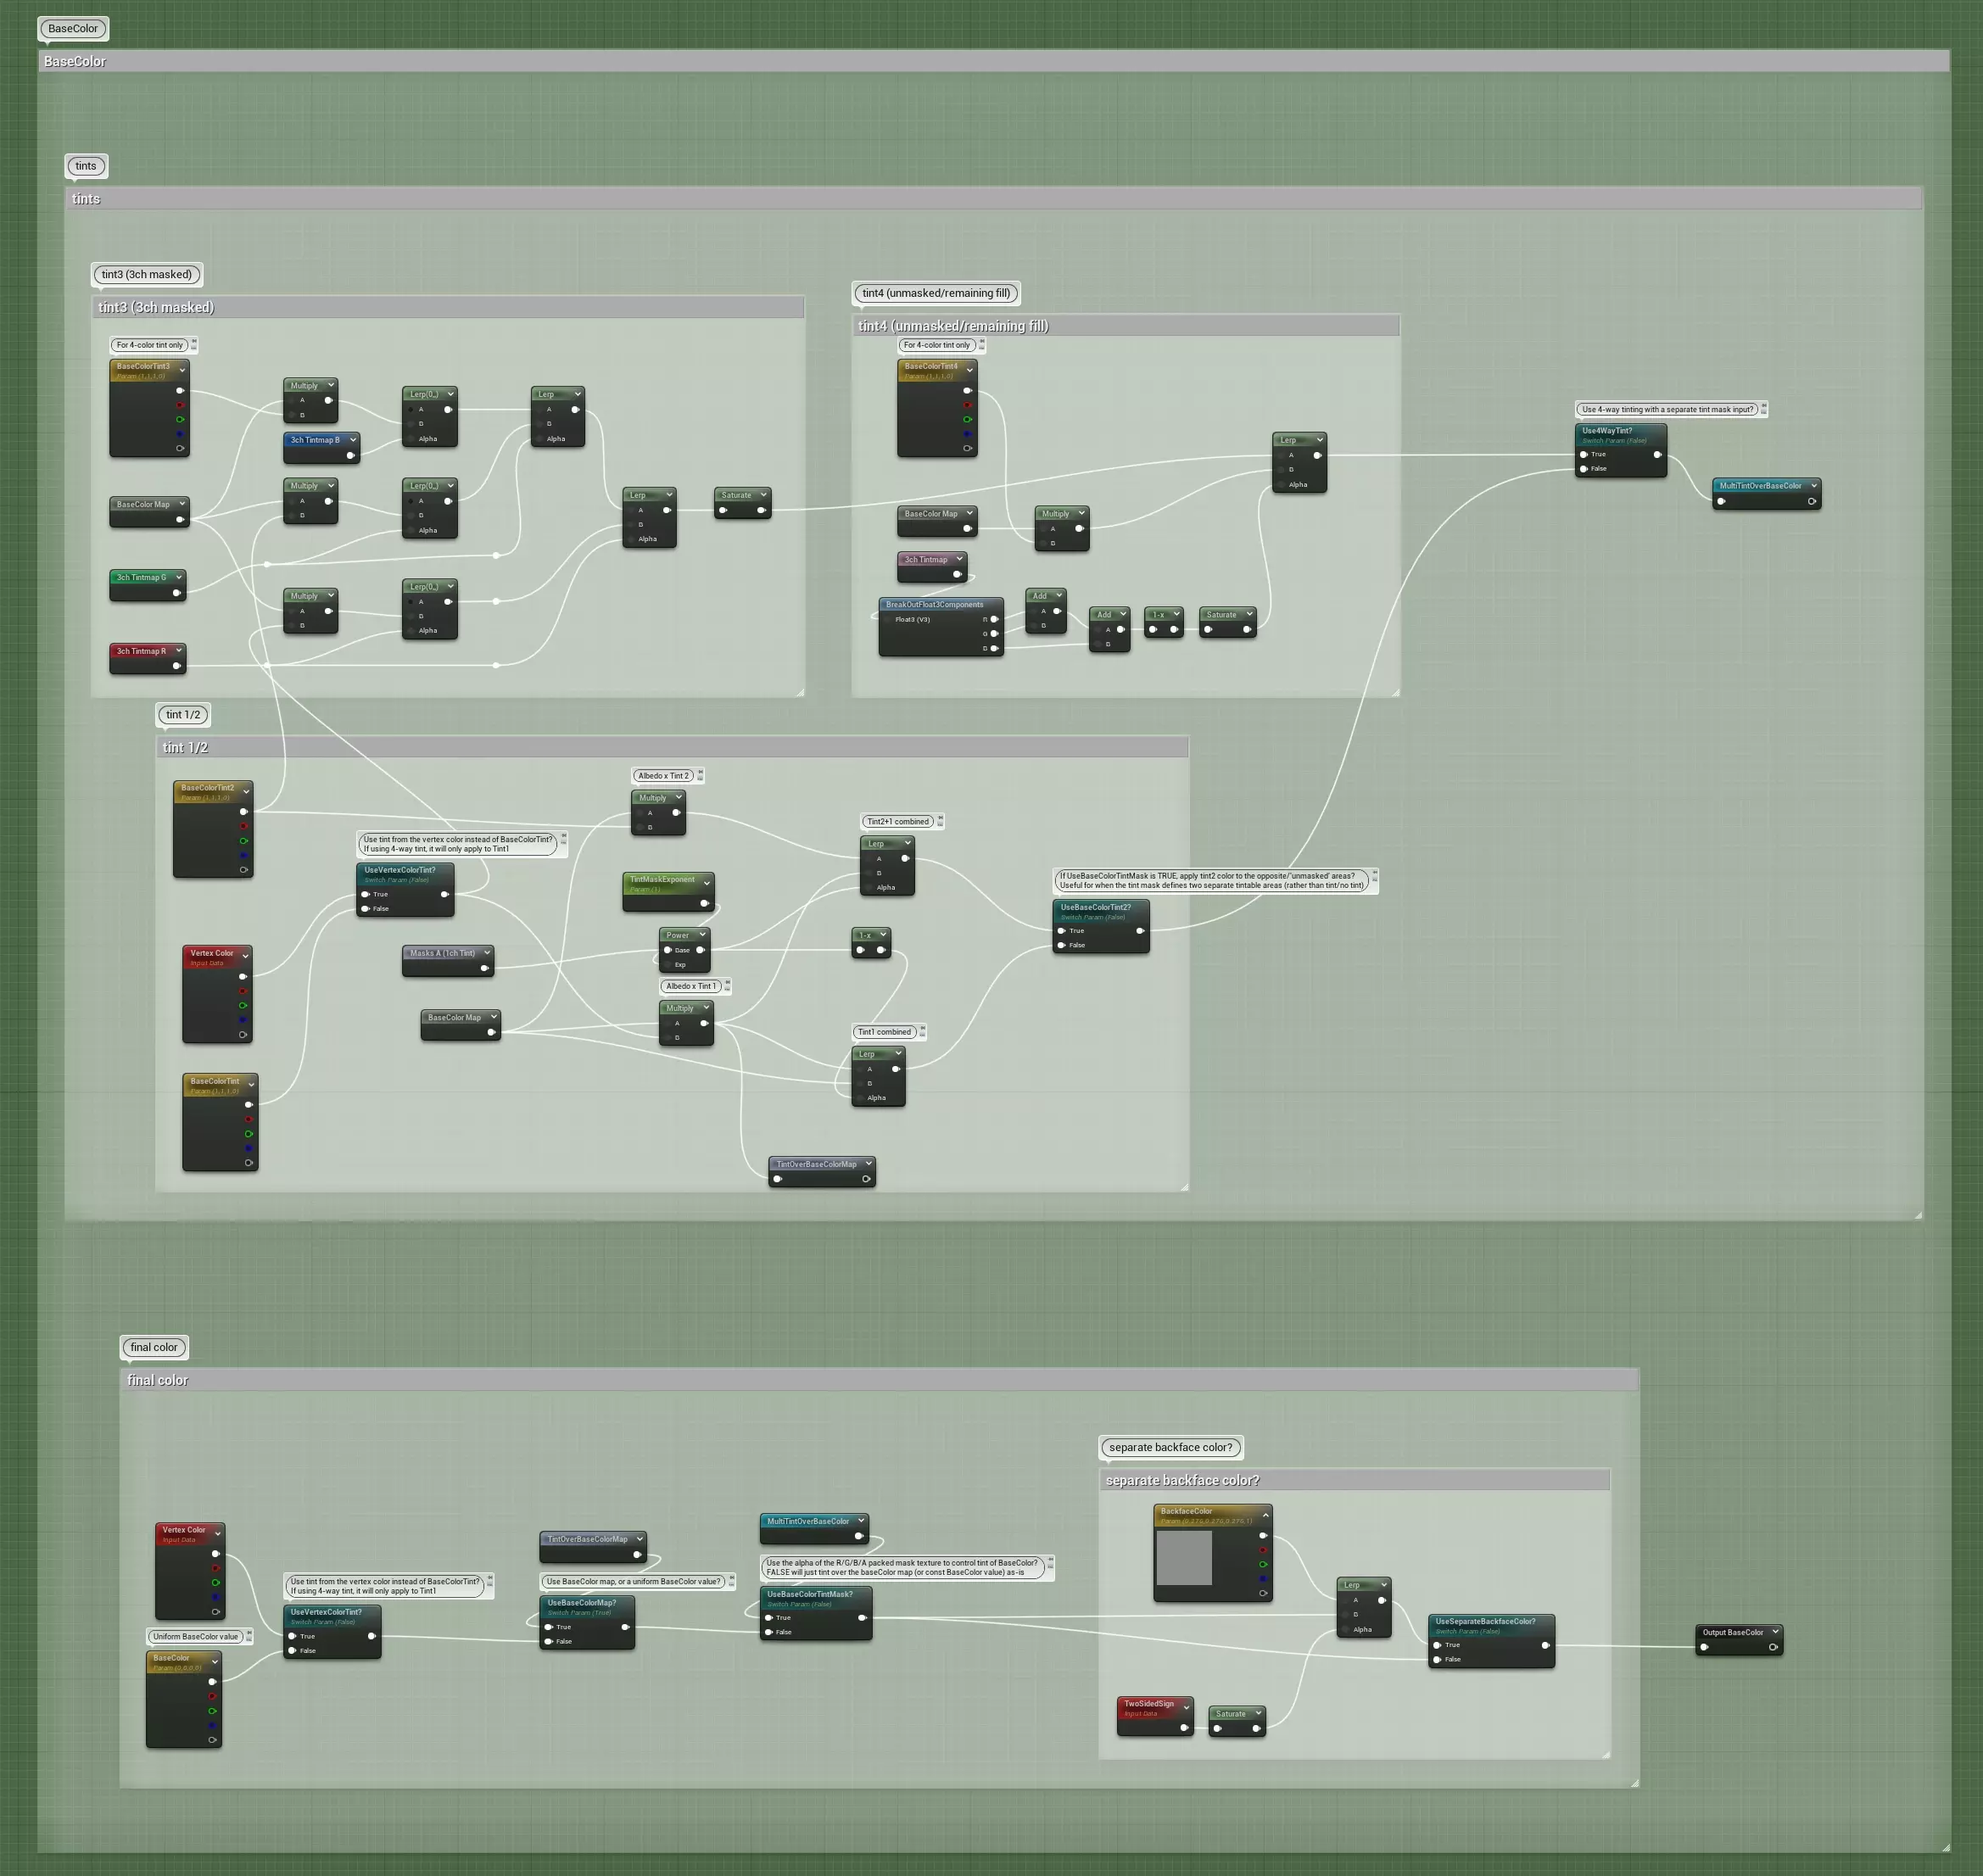
As shown below, a wide range of color-variant materials can be created from a single albedo texture and a mask. A Substance Painter preset was also created so that the tint mask could be easily authored and packed together with the other maps.

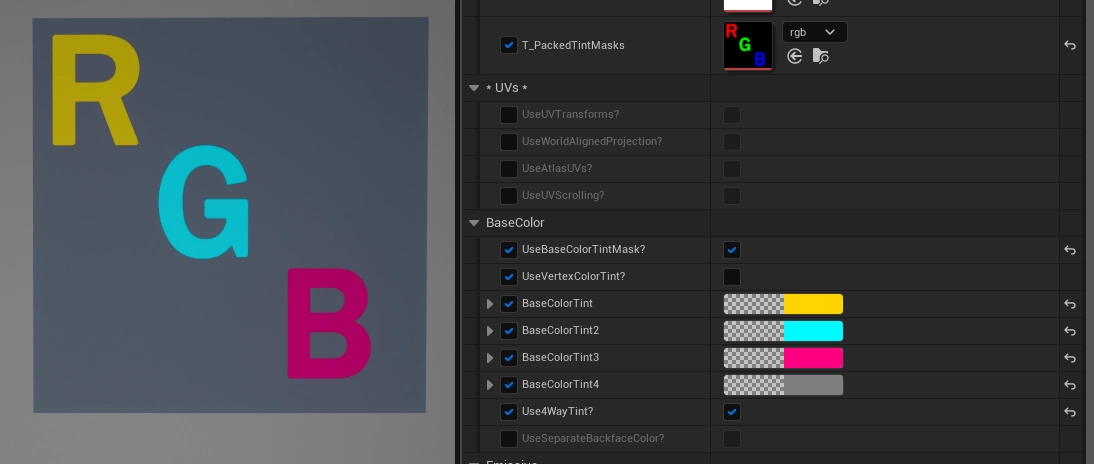
An additional requirement of the project was to support 3- or 4-way tinting using a separate "tint mask" input. The R/G/B channels of the tint mask correspond to Tint1/2/3 color parameters in the material. A Tint4 parameter is also available, for layering over the remaining, unmasked areas. The examples below are the result of four tints applied to the different areas defined in the R/G/B tint mask. The second example (with the color test swatch) illustrates the nature of tinting (as opposed to replacing) the underlying colors of the base texture.

Detail Maps
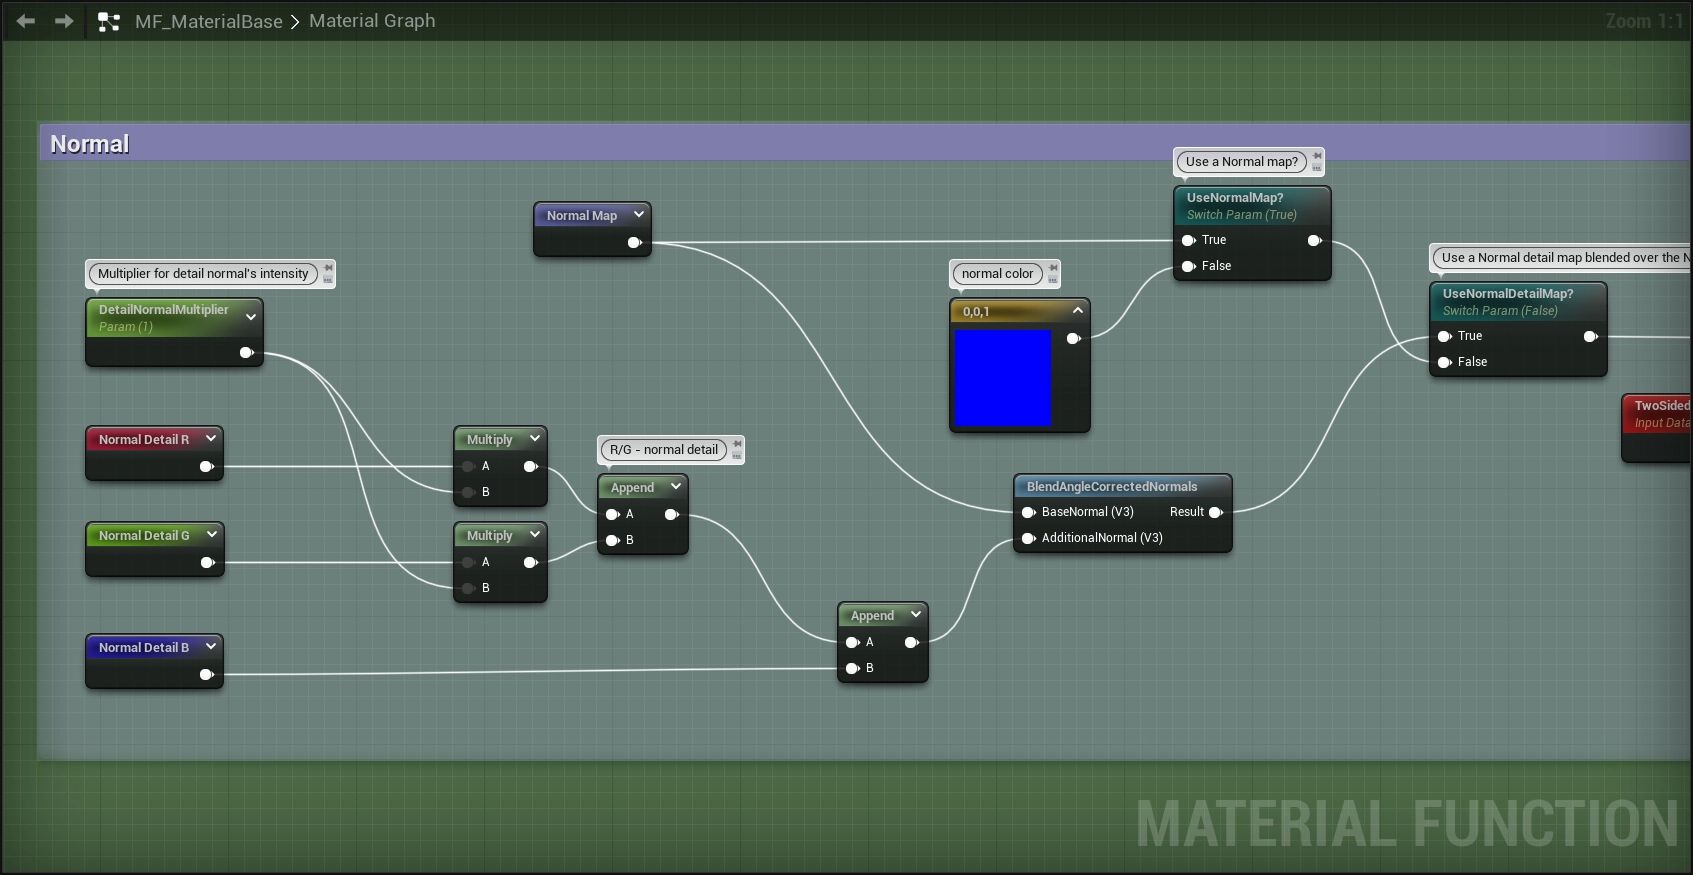
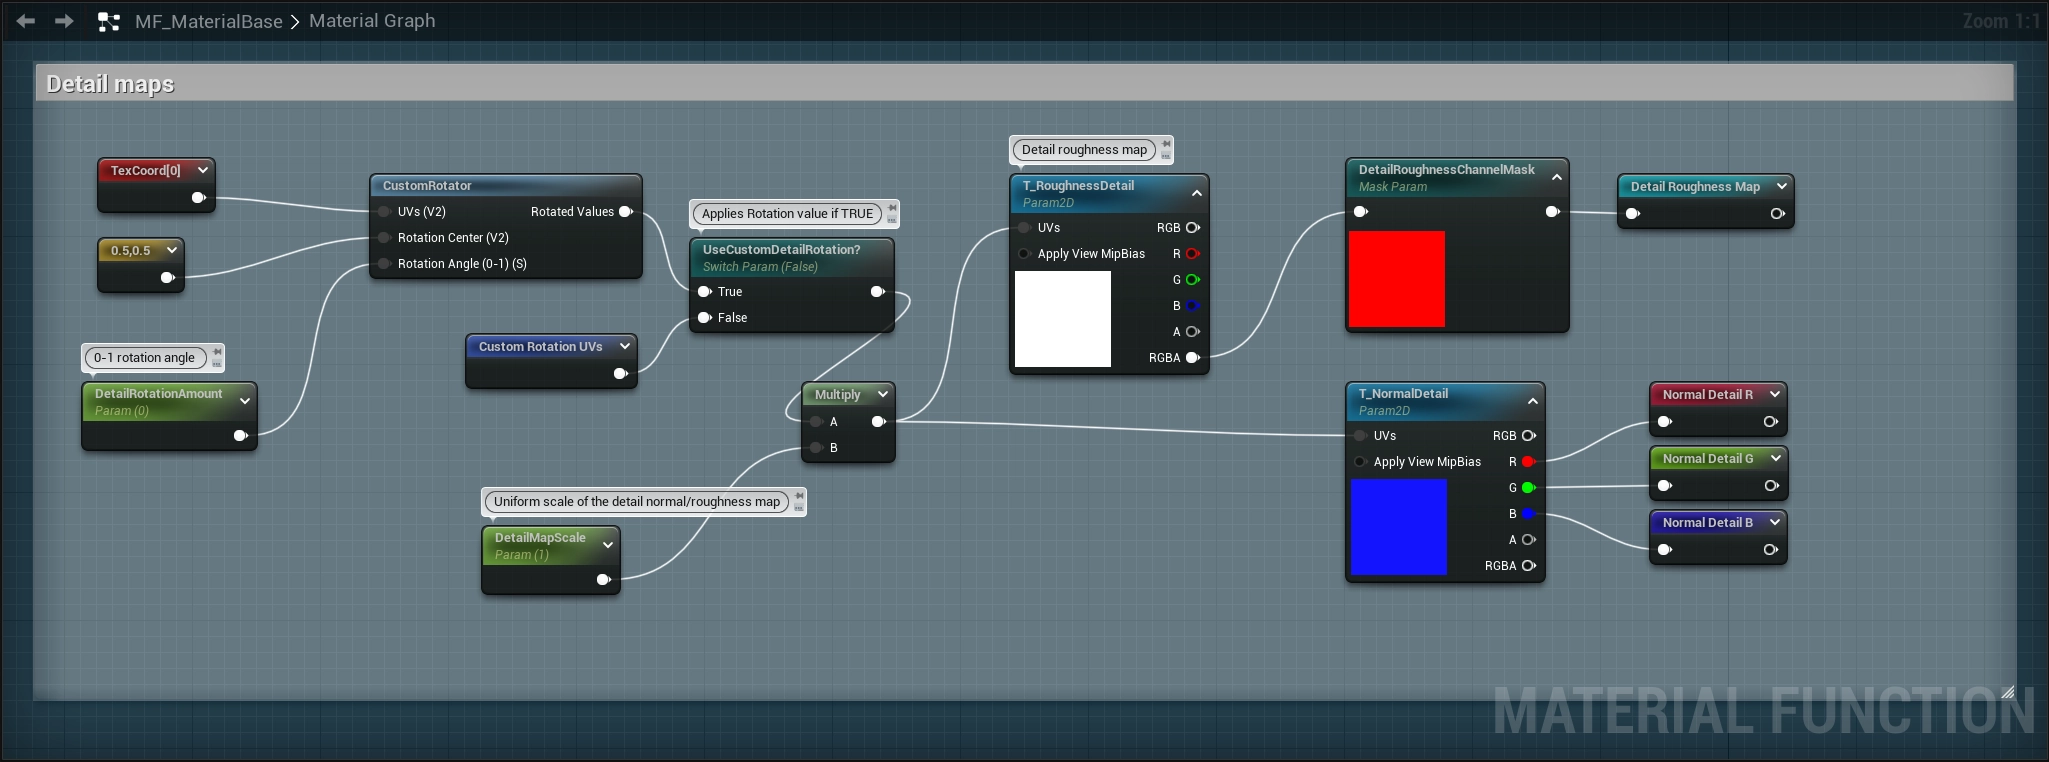
Layering of additional roughness or normal "detail maps" is supported. These are separate textures which can be blended over the material's base roughness/normal map. There are controls for intensity, rotation, and scale independent from those which control the base roughness/normal maps. This can be a useful tool for variation, especially if the detail map can be re-used, or if it would be more costly to import an entirely new set of textures - which it often is!
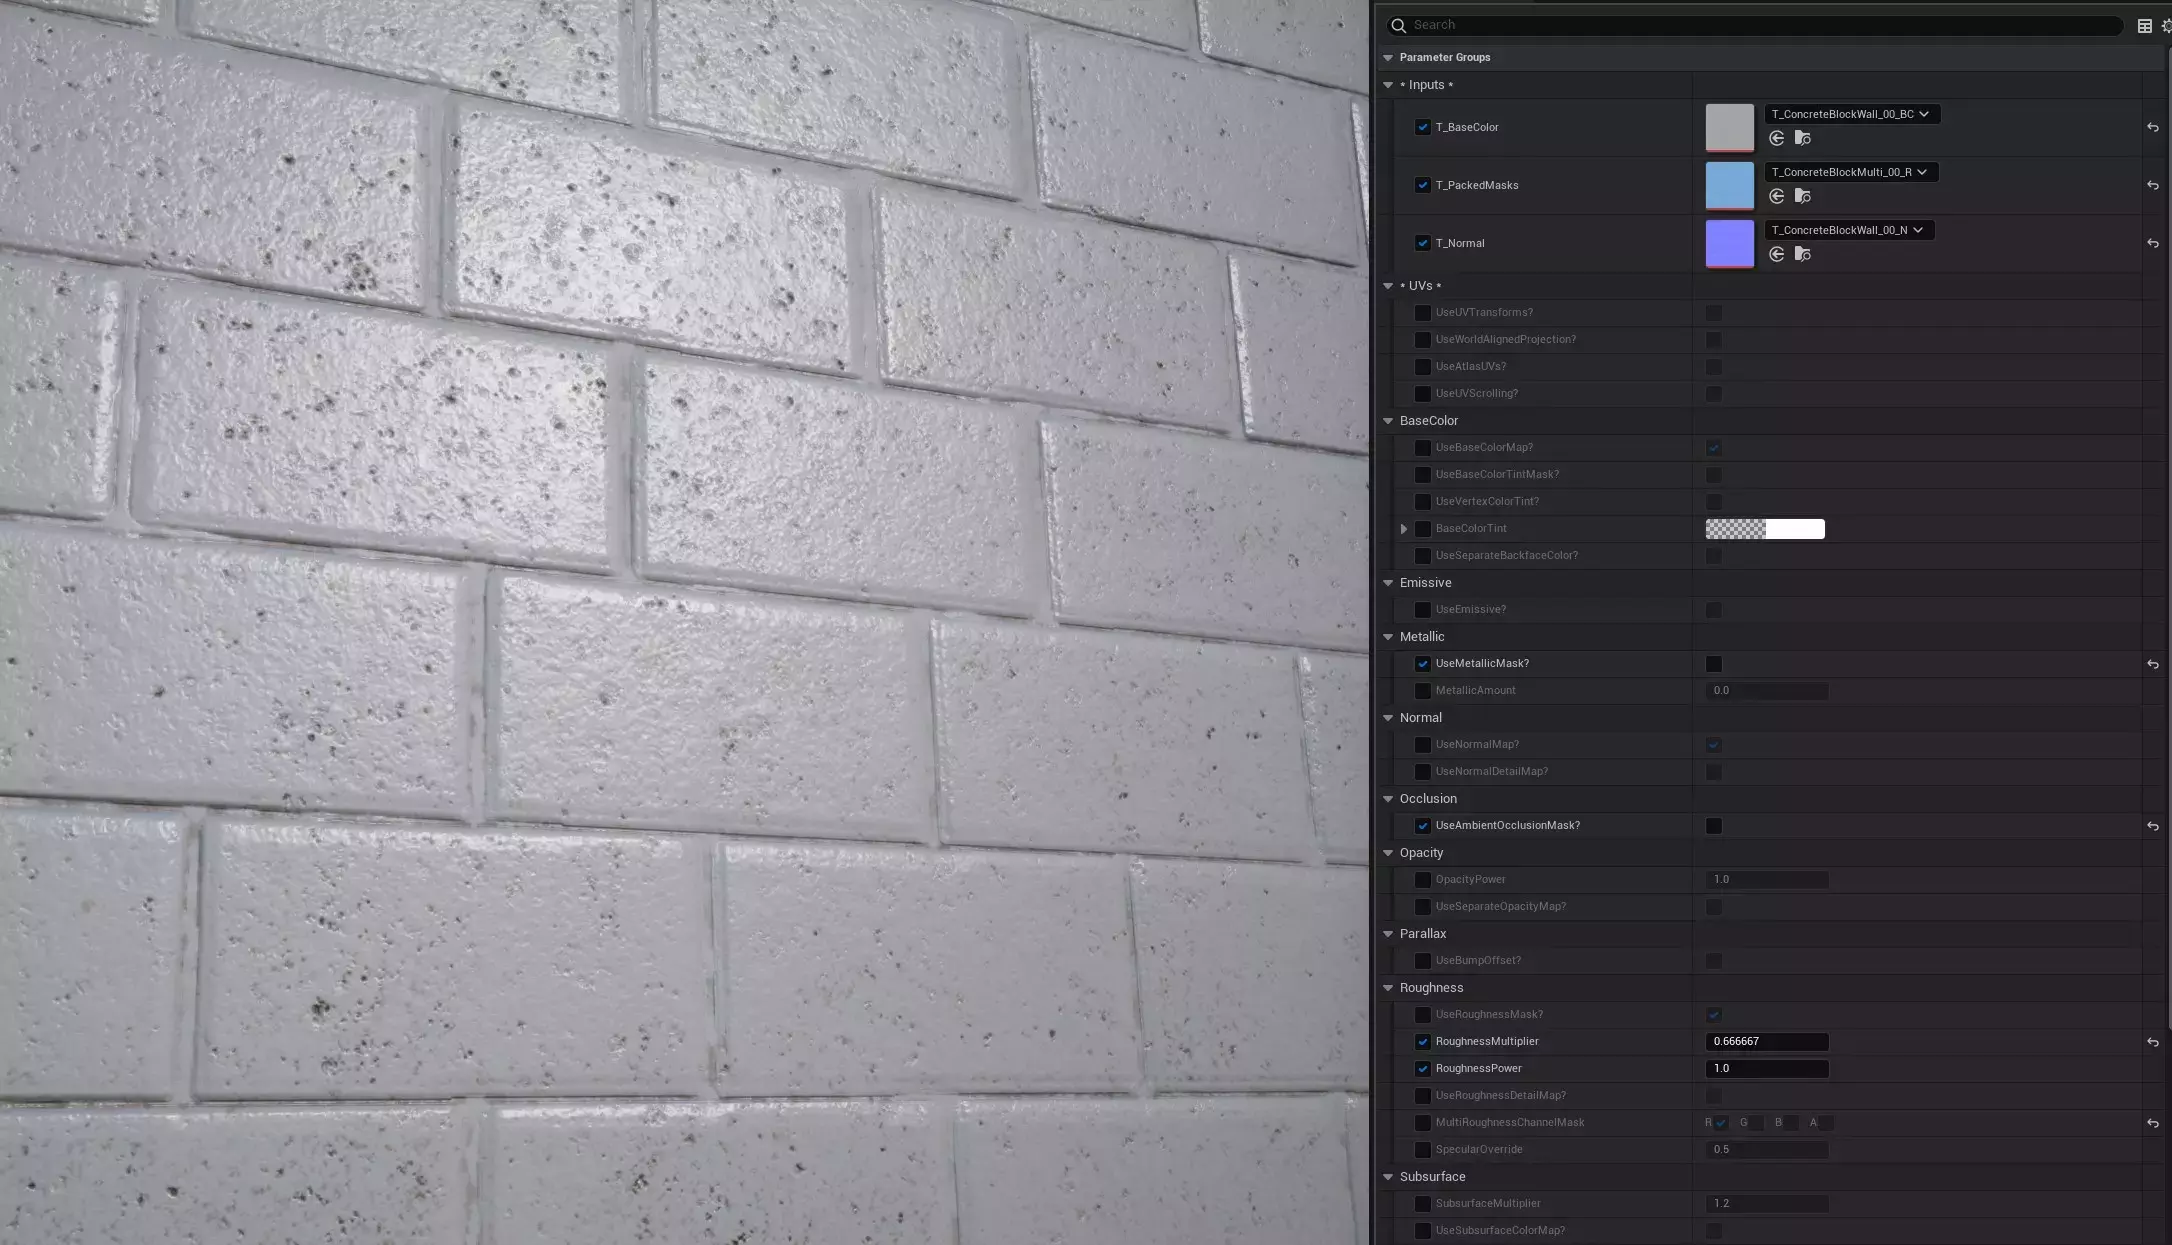
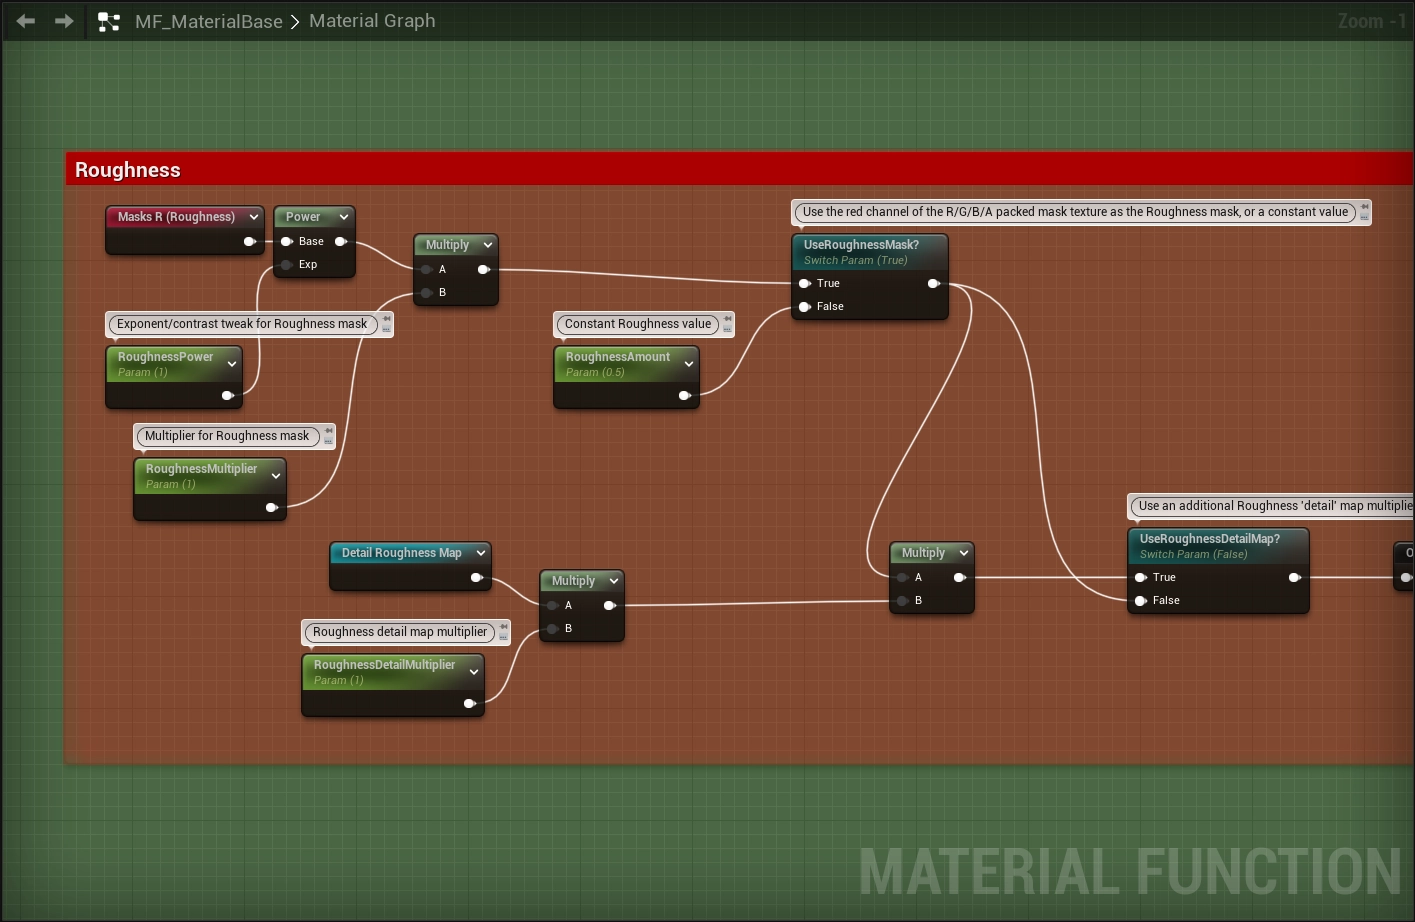
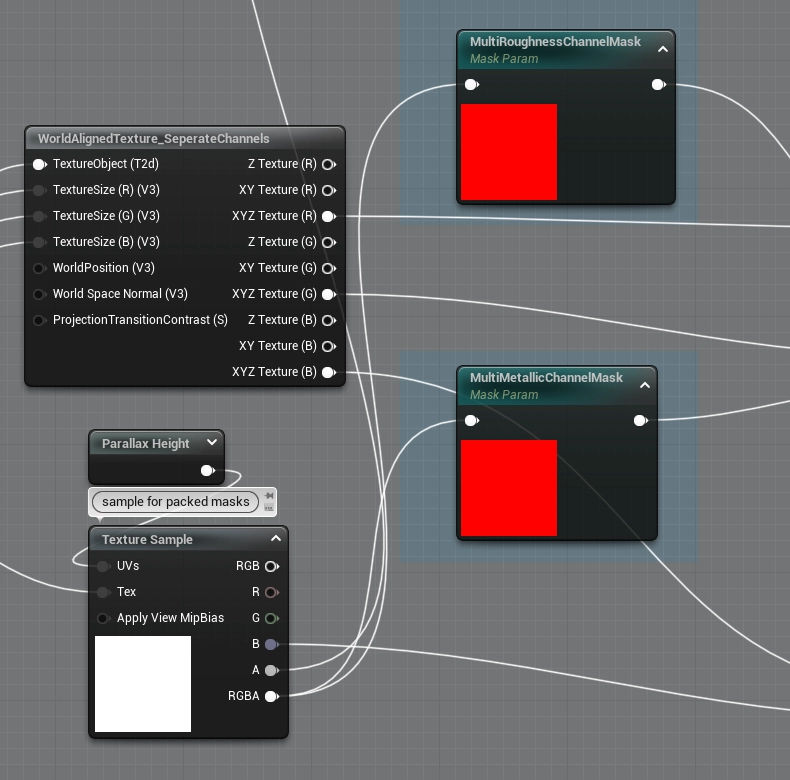
Multichannel Roughness/Metallic
Although a packed roughness/metallic/AO mask is a default input in this material, many assets have no need for a metallic or AO input and can use a constant value instead. Doing so can free up two channels, but that's just waste in the packed mask textures...unless it could be repurposed somehow?
There is a perfectly good reason to avoid packing different materials' masks together - block compression can cause "cross-talk" artifacts between channels to become apparent, especially when the degree of contrast between the individual channels is high. However, with care, it seems possible to avoid these artifacts, or at least possible to avoid them becoming problematic or noticeable.
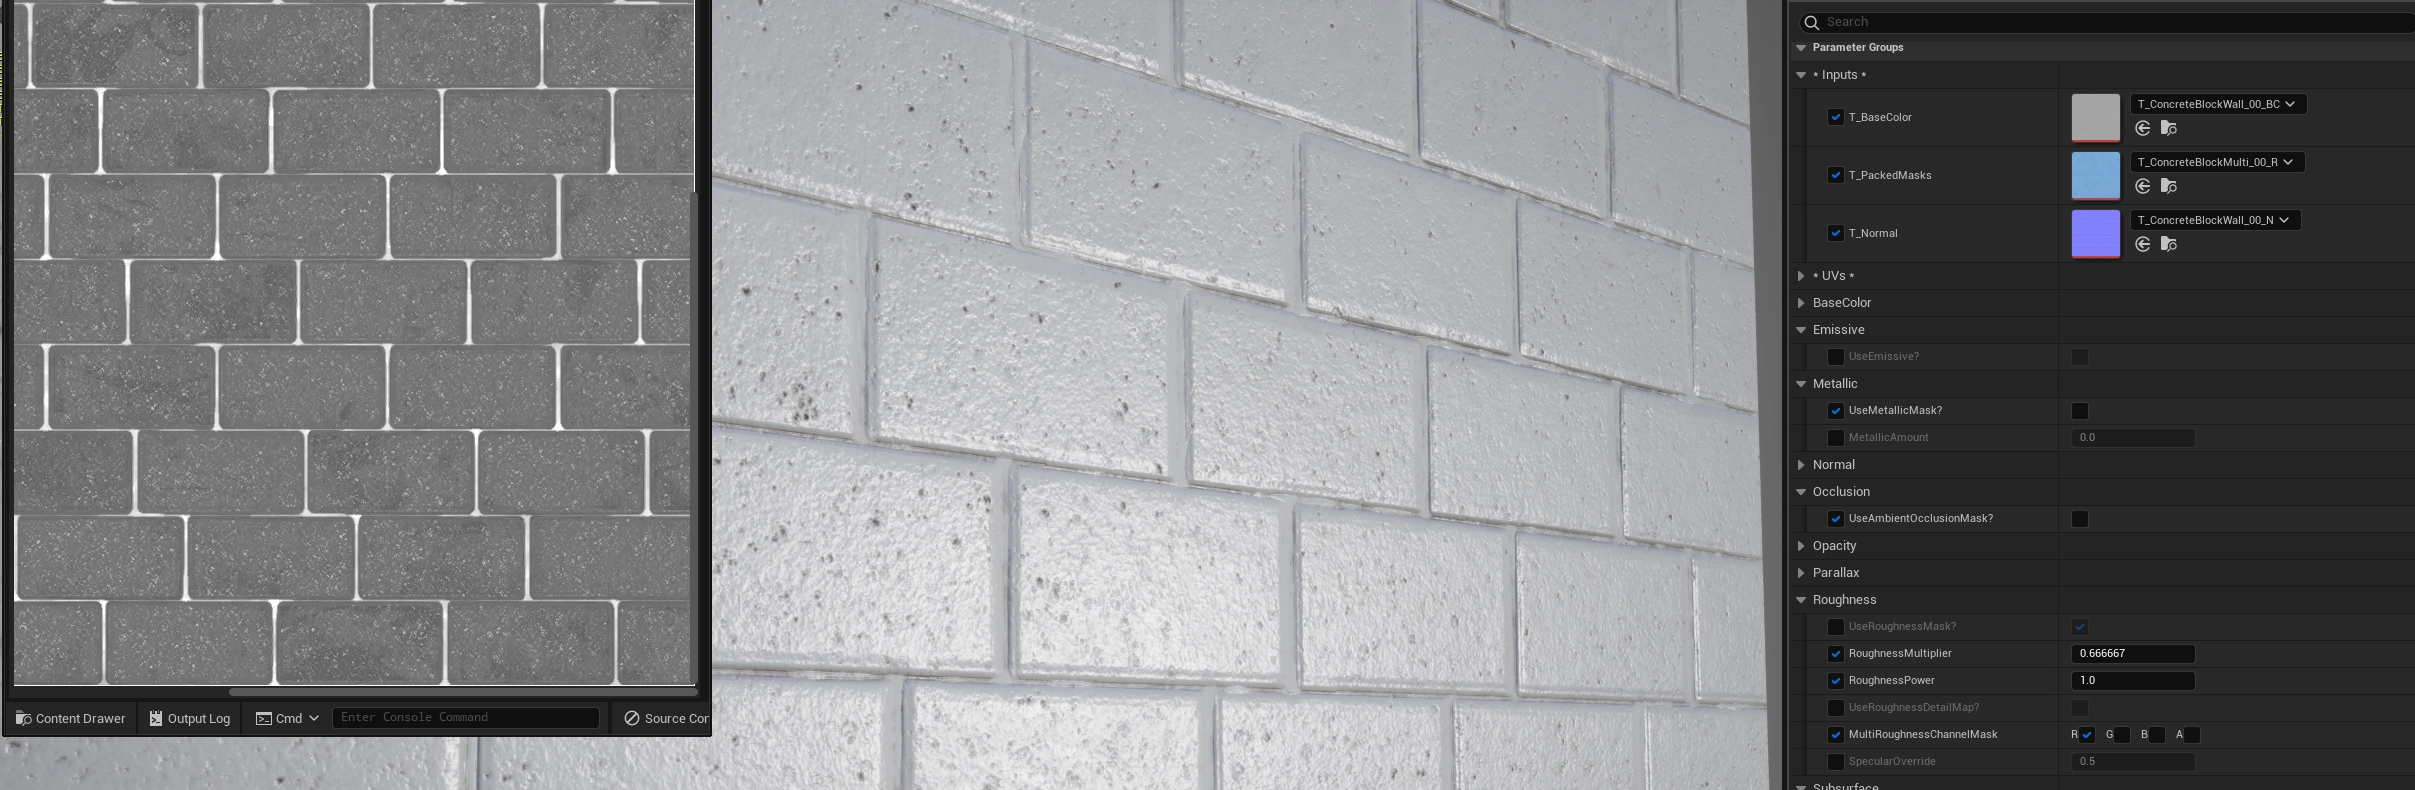
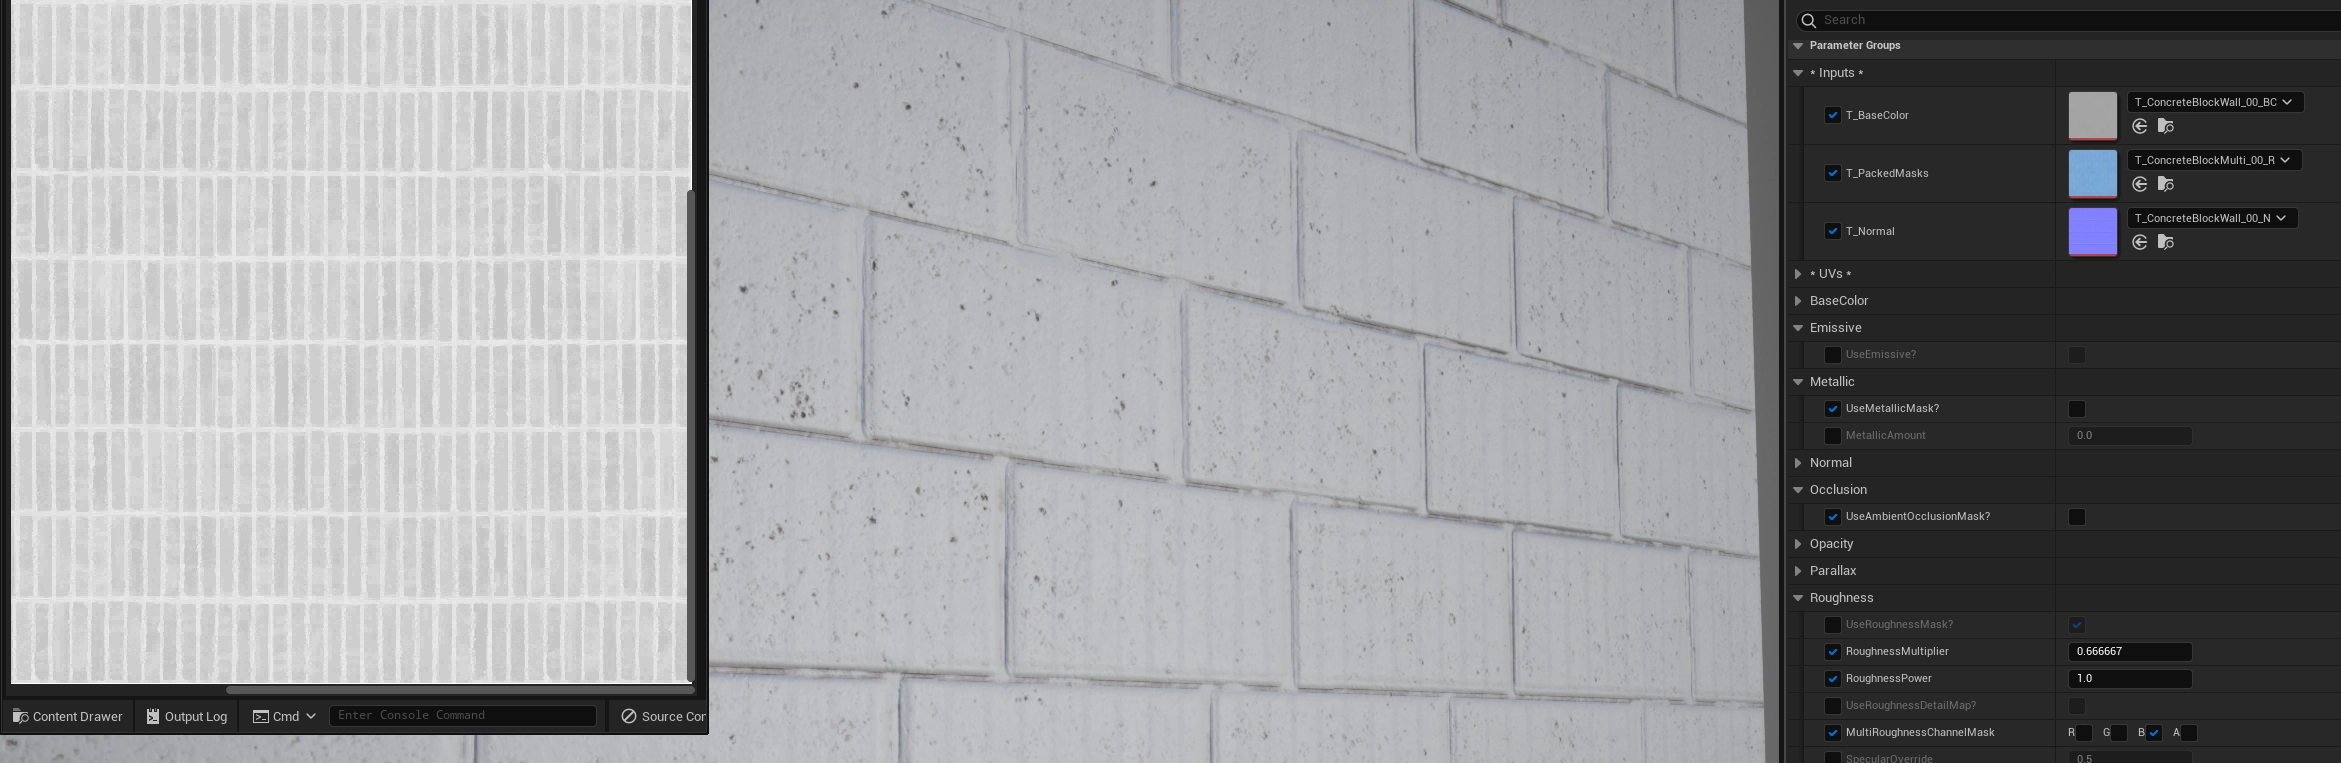
This is a material using a "composite roughness" map - the green and blue channels contain roughness information for two separate materials, each of which didn't require a metallic or AO input. In the second image, the mask parameter has been changed to load from the blue channel, instead of red. As expected, there's a visibly different roughness pattern, but no artifacting or blending of the channels was detected when the correct roughness texture is loaded from the red channel (as in the top image). Results were similar across other materials - there was little to no perceptible difference after combining some unique roughness maps to composite maps.
Memory savings are not extreme, but were still worthwhile - for every three materials converted to use a composite roughness texture, two unique mask textures could be removed. The node setup is very simple: the mask parameter node exposes a channel selection in the material instance. In the base material, a mask parameter is provided for both roughness and metallic channels.
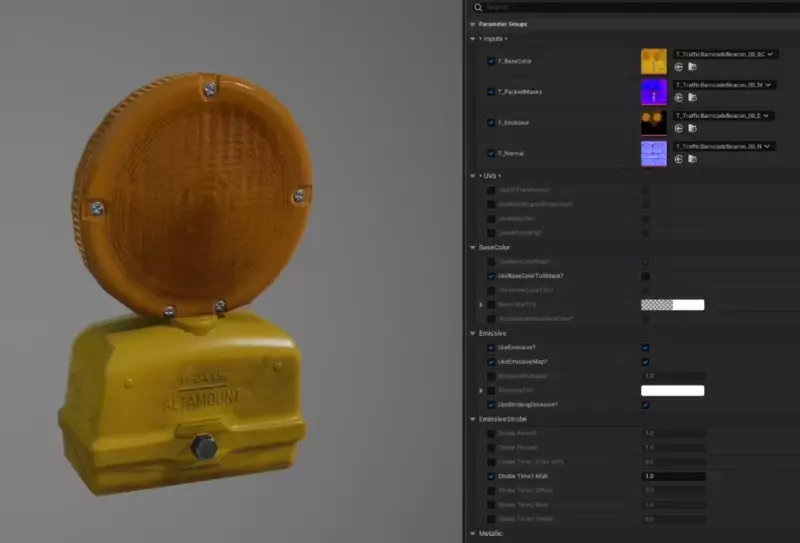
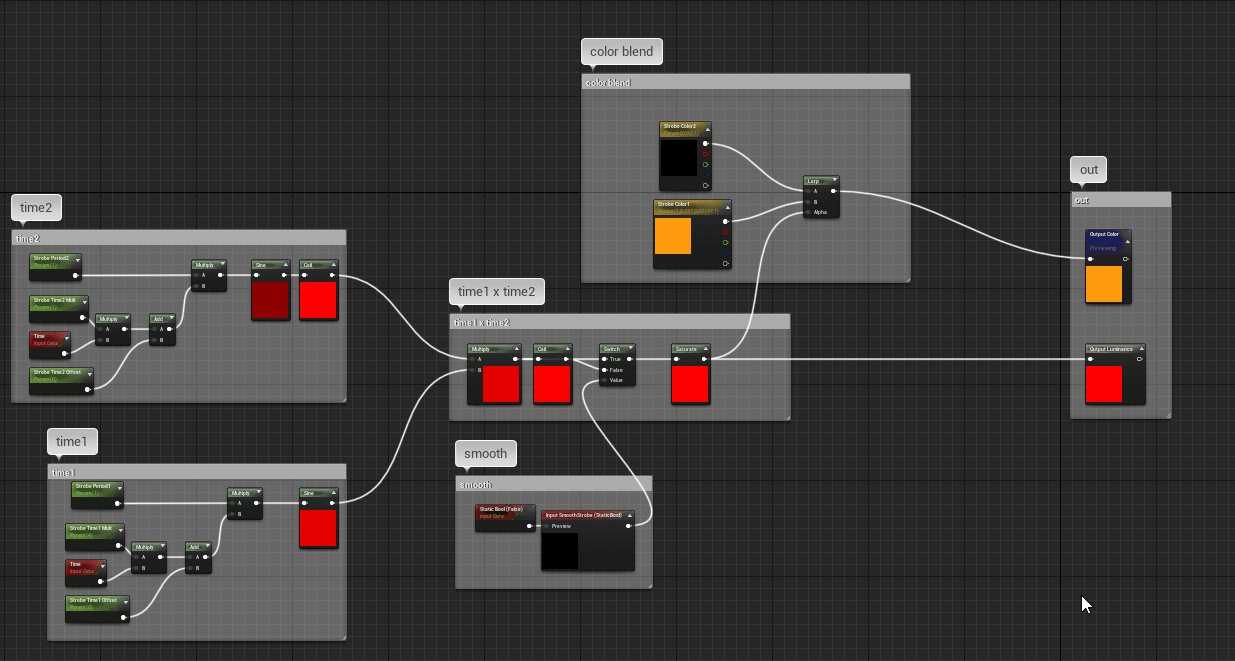
Emissive Sequence and Strobe Animation
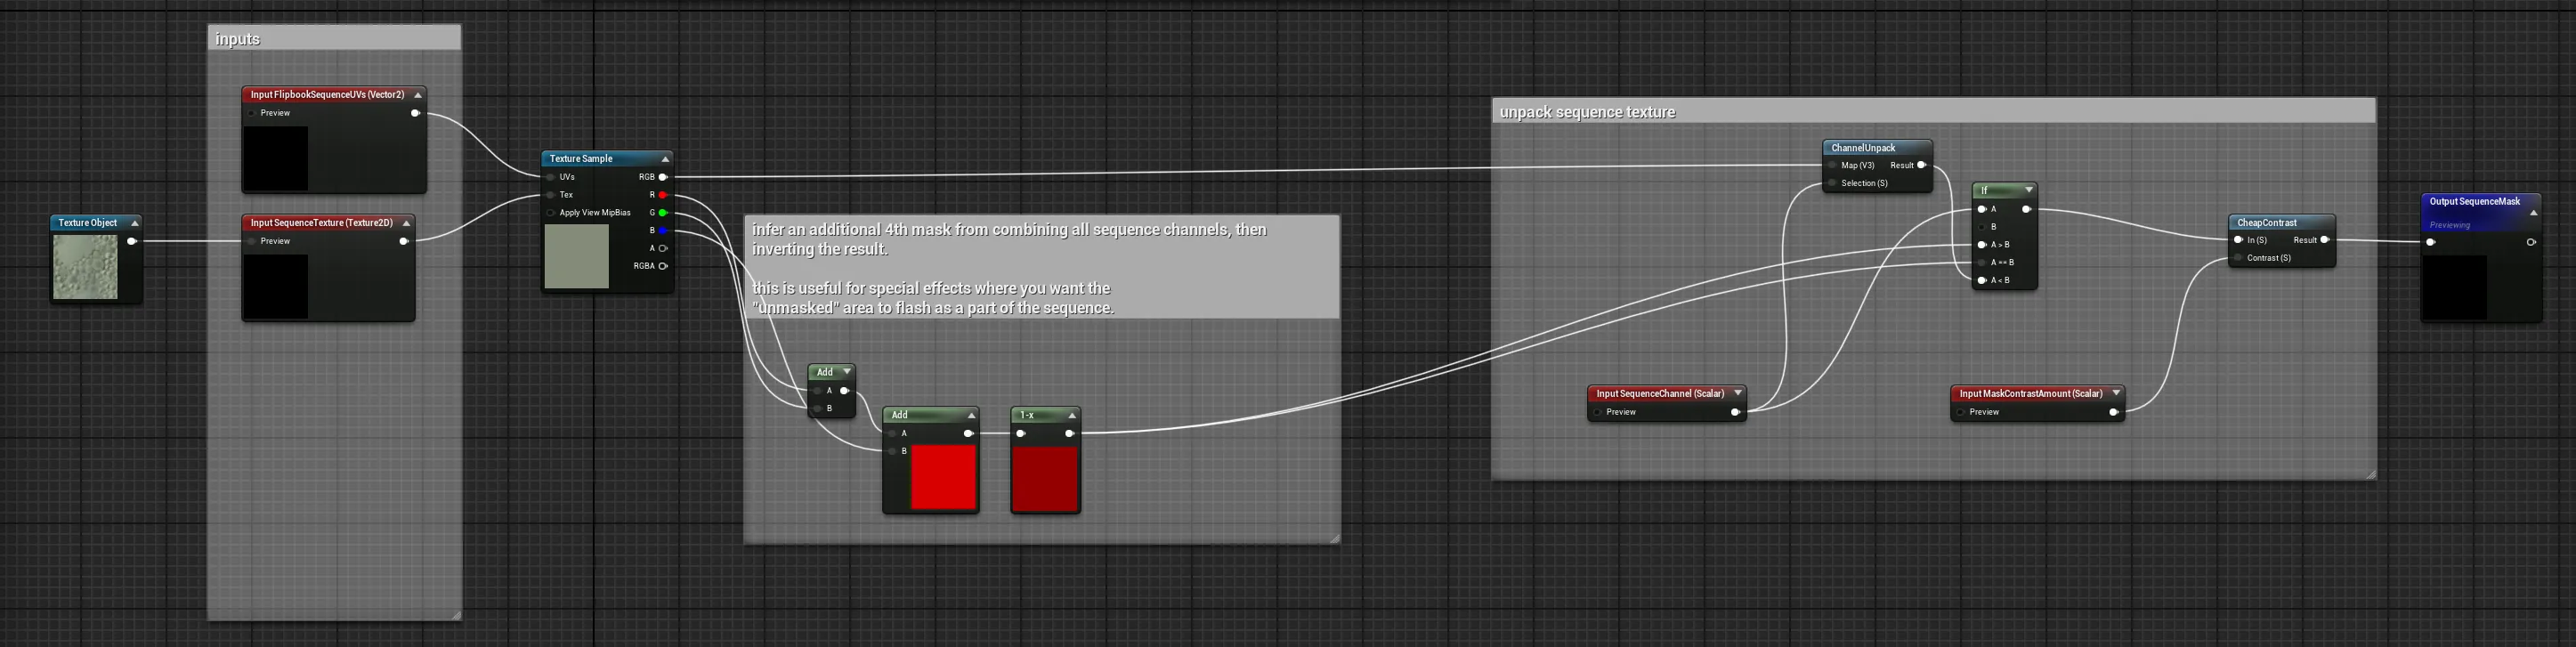
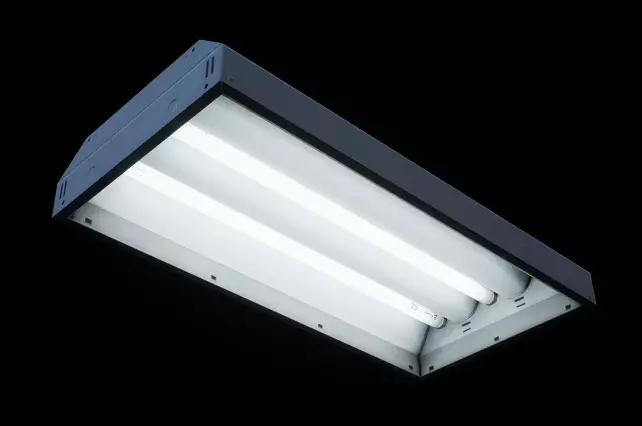
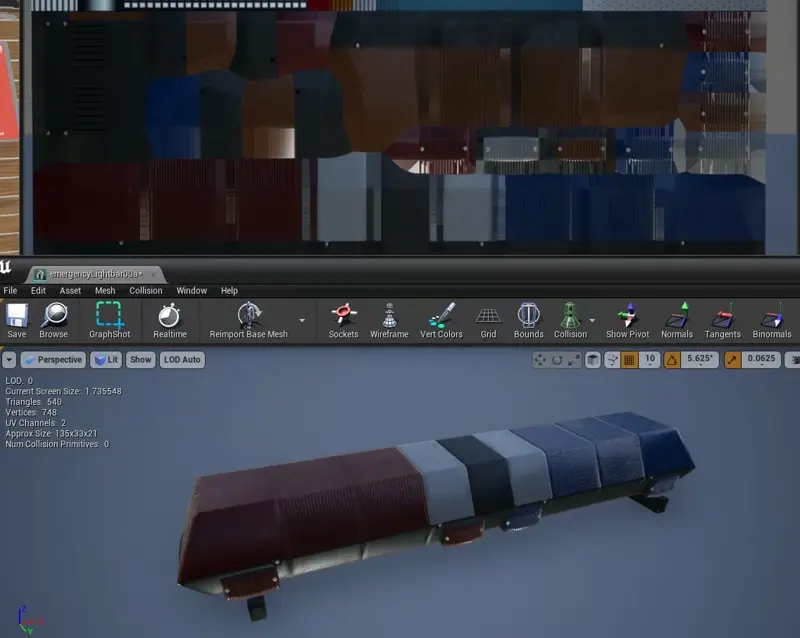
This feature was developed to support complex animations in the emissive channel, and was eventually extracted to a separate material. The primary use-case was for special props whose emissive animation is more complex than simply switching on/off, like sequential marquees, holiday lights, or this emergency vehicle light bar, which has a two phase animation.
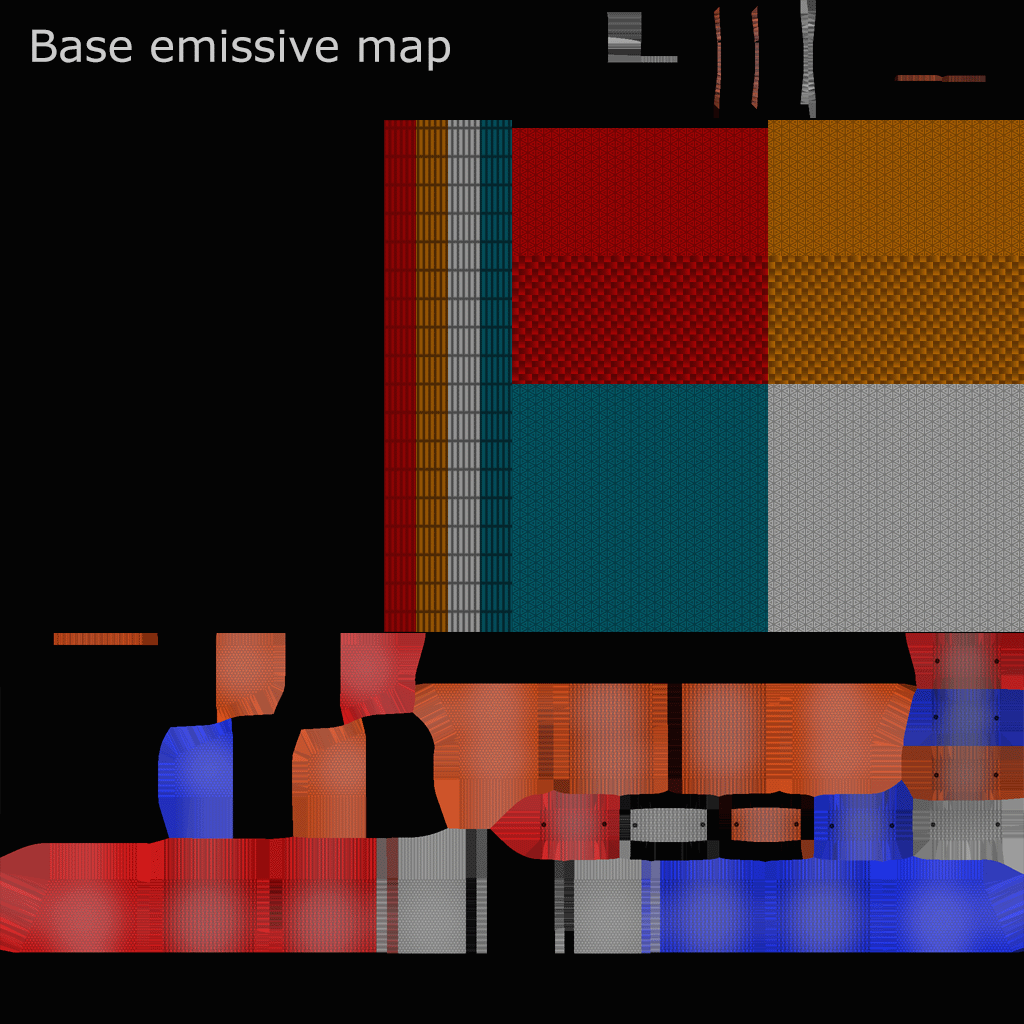
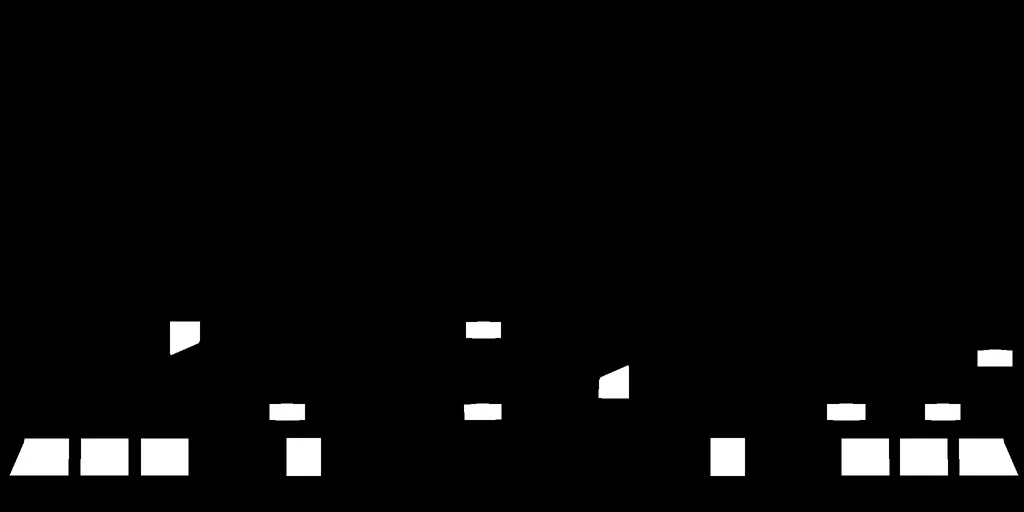
The "sequence map" is a mask which is interpreted as a multiplier/control of the overall emissive level. This mask is treated as a Flipbook animation, with each frame stretched to fill the 0-1 space. As the animation plays, different parts of the emissive map are masked on or off. The result is that only the mask texture contains multiple frames, which allows retention of full-resolution maps for the albedo, normal, masks, and emissive channels. Also, only a single channel's data is used for the sequential animation, so three different animations can be packed to a single sequence texture if necessary.
Additionally, the example above is modulated using an "emissive strobe" effect which is further composited over the animated sequence. This is responsible for flashing the lights quickly during their "on" phase, but was also used independently for strobing materials without a frame sequence.
Notes on Performance and Maintainability
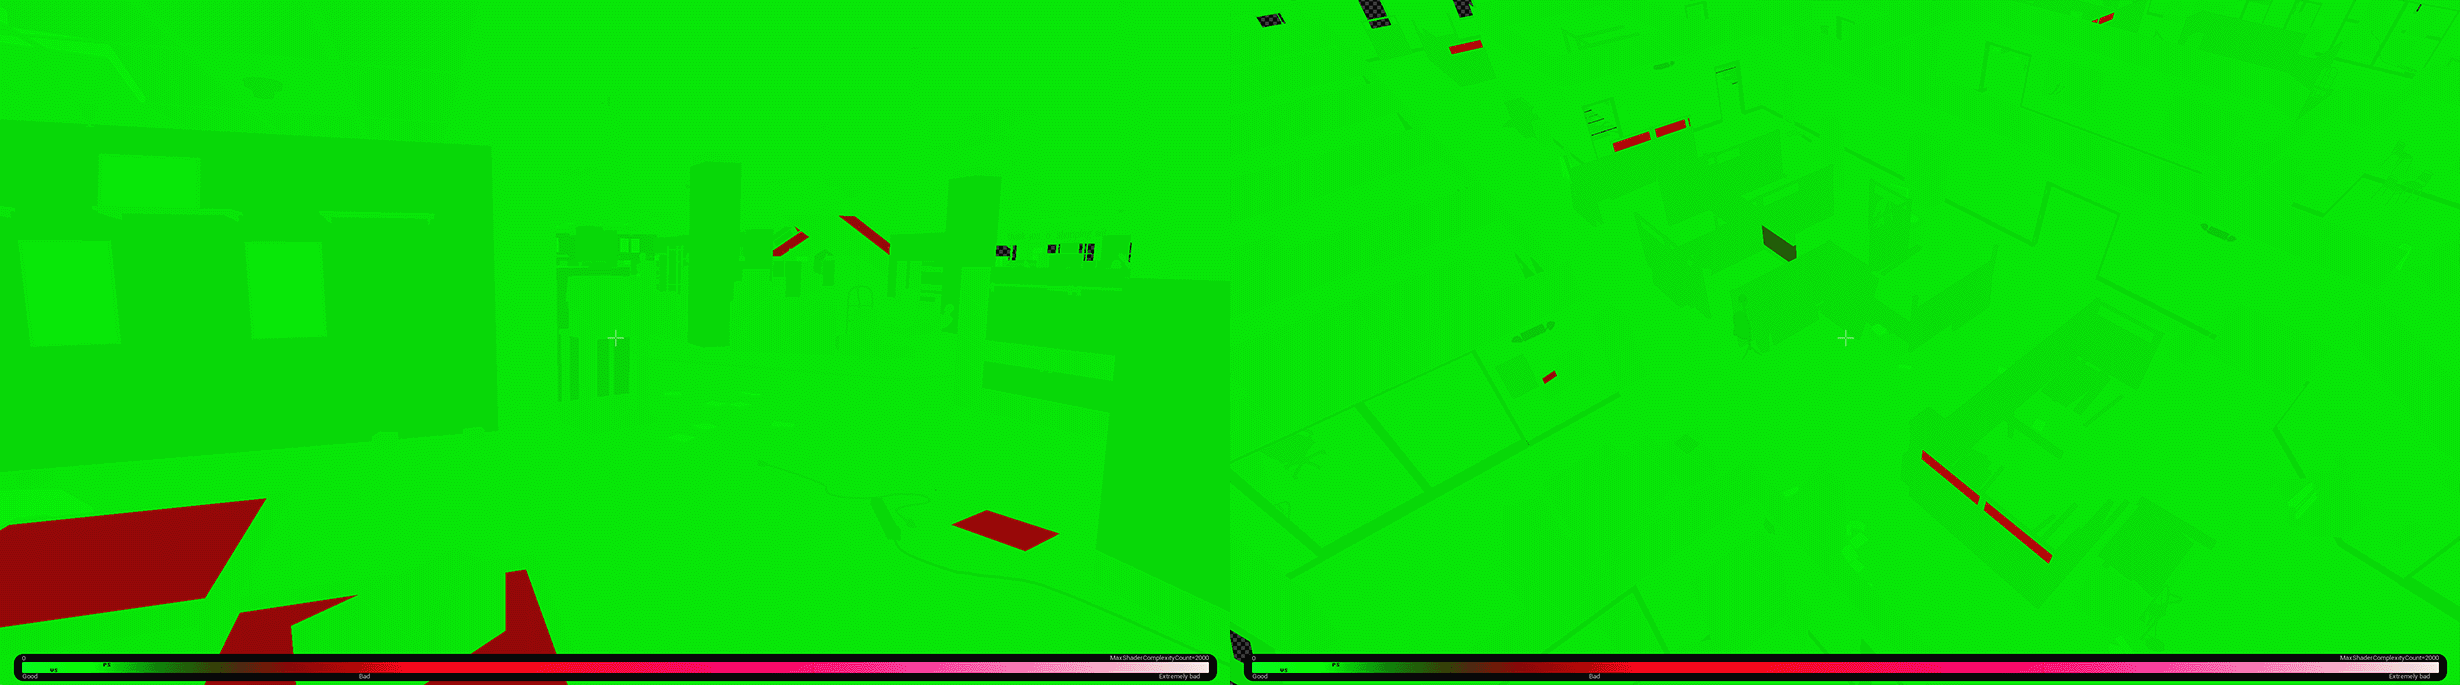
The following animation compares the unlit view and shader complexity for two different levels utilizing this material for (nearly) all assets.
Notable exceptions are glass/translucency materials, which are generally costly, and appear as red in the complexity view.
Some concerns about larger, 'monolithic' base materials relate to performance and instruction count. By using static switch parameters, the various unused 'branches' of the material setup are compiled away, so the cost at runtime is limited to the compiled nodes' instruction count, not every branch.
Having a larger graph with more features/switches can indeed affect compilation times and shader variations - provided that there are different instances utilizing different permutations of material features. In our case, the majority of materials simply replaced input texture samples, or enabled lesser-used maps such as emissive or height.
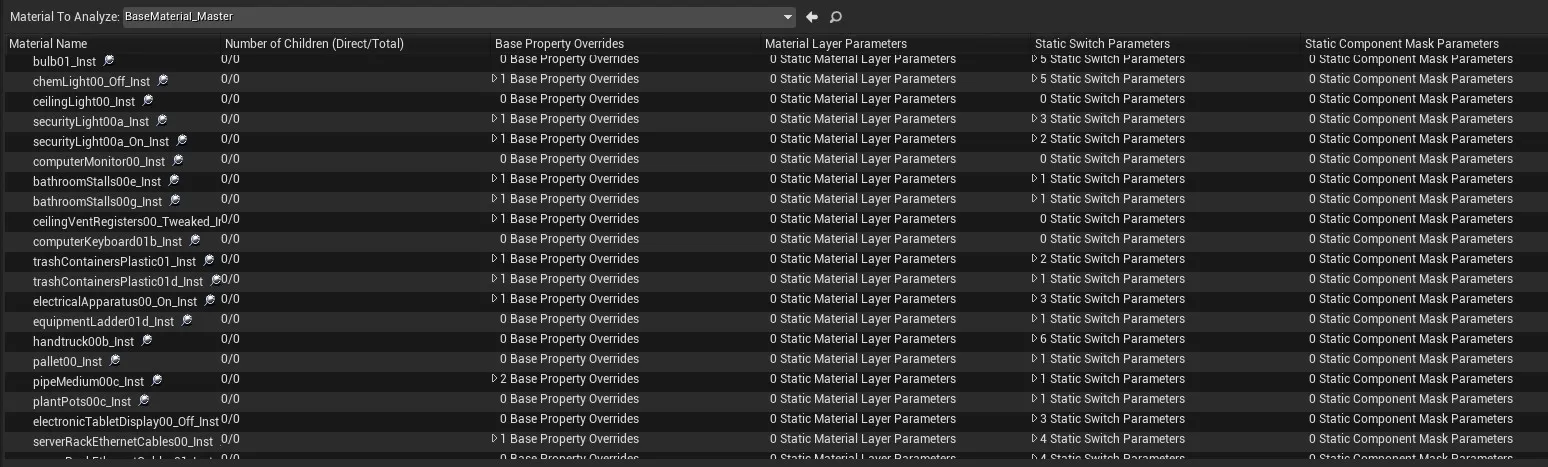
Unreal's Material Analyzer (found under Window>Developer Tools) can give an overview of shader permutations and parameter utilization. As it can identify redundant permutations and make suggestions about merging or reparenting materials, it is an especially useful diagnostic tool. Here, it displays some of the project's instanced materials and their respective number of parameter and switch overrides. As an optimization step, we could potentially look at reparenting and condensing down materials which share the same configurations.